


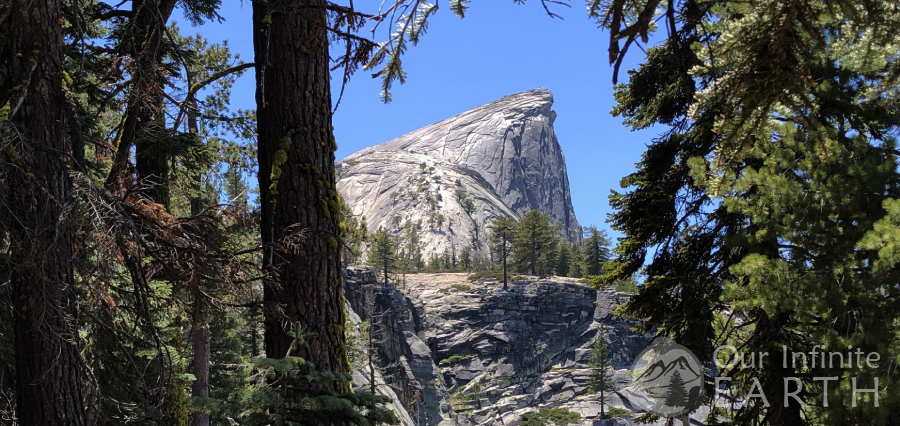
Hiking Half Dome is a “bucket list” item for many people and is not something to commit to lightly or to go into unprepared. This 8,844 ft tall peak in Yosemite National Park provides incredible views of the valley floor and surrounding areas. Hiking to the top of it is no joke and is not for inexperienced hikers. It takes endurance and planning to reach the summit.
I did this hike with @msadelatirado, @stephaniepanisello, @comeintotheout, @rikdtlaperez – some of the photos are theirs and used with permission.
The Half Dome Hike
- Distance: 17 miles round trip (depending on your route)
- Type: Out & Back (could also make it a loop)
- Elevation at trailhead: 4,800 feet
- Elevation Gain/Loss: Elevation Gain: 4,844 ft (depending on your route)
- Difficulty: Extremely strenuous
- Time: 10 – 14 hours
- Permits: Required, very competitive
- Crowd Factor: Moderate-High
- Best Time: Memorial Day through Columbus Day, weather permitting when the cables are up
- Water: Yes, but needs to be purified
Highlights
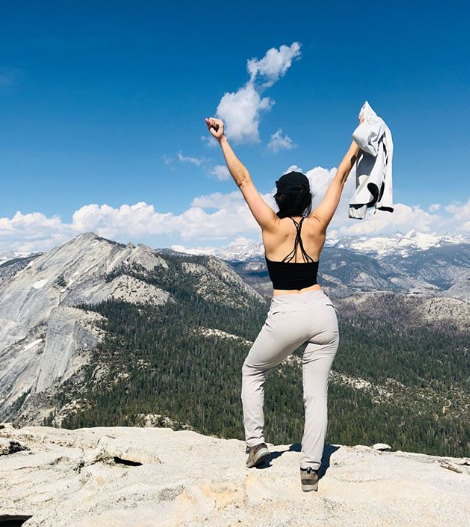
- Incredible views from the top
- Incredible views and waterfalls along the trail
- Super sense of accomplishment
Lowlights
- Crowds, especially on the weekends
- Difficulty getting a permit
- Exhaustion from length and elevation of the hike.
How Long Does It Take To Hike Half Dome?
On average, it takes a fit person between 10-14 hours to hike Half Dome. This time is going to vary depending on the route that you take, the ability of your group, the wait and line at the cables, and how long you want to spend looking around once you’ve reached the summit. It took our group 15 hours to complete this hike and some members of the group weren’t feeling very well, so we had a pretty slow pace.
What Is The Distance of The Half Dome Hike?
The distance of the Half Dome hike is 17 miles, although this is going to vary a few miles depending on the route that you choose (see more below). Hiking to Half Dome via The Mist Trail is the shortest, most direct route and is 17 miles, which is the distance that most people associate as the “Half Dome hike”.
What Is The Elevation of Half Dome?
The elevation of Half Dome is 8,844 ft, making this a difficult trek due to the altitude. If you have not previously hiked at higher elevations (above 8,000 ft), you should try to get yourself use to this as much as possible before attempting this hike. The air gets thinner at 8,000 ft and can really impact your enjoyment of the hike. Try to find a local mountain in your area that reaches 8,000ft and hike it a few times before attempting Half Dome in order to get yourself and your lungs prepared. Read more here about altitude sickness – symptoms, how to recover, and its impact.
How Difficult Is The Half Dome Hike?
The Half Dome hike is difficult and very strenuous and should not be attempted unless you are fit and an experienced hiker. This hike is an endurance test more than anything else since you will be covering a lot of miles and also climbing considerably in elevation. You can’t just jump off the couch and do this hike….. I mean you can, but you’re going to be miserable and could hurt yourself. During our trip we came across a girl throwing up along the side of the trail and 3 other instances of rangers giving medical attention to hikers who had over exerted themselves and were light-headed, dehydrated, or had heat stroke. If you actually want to enjoy the hike, you should be preparing with regular physical activity – jumping on a stair master is good practice!
How Many People Have Died Hiking Half Dome?
Since the cables were installed almost 100yrs ago, eight people have died from falling off the cables. There’s a different between the total number of people who have died on Half Dome and the total hikers who have died on the cables because Half Dome is also popular among rock climbers. There are a lot more rock climbing deaths on Half Dome than hiker deaths from the cables.
Getting A Permit
Permits are required! Part of why this hike is so highly sought after is that it’s difficult to get permits to reach the top. Anyone at any time can hike to the sub dome, but in order to go up the sub dome and on the cables to the top of the dome, you need a permit. There are only 300 permits issued per day, in an attempt to keep hikers safer and reduce the congestion on the cables. As a result, this hike is something you need to plan ahead for – months in advance.
If you’re not able to get a permit, there are other options! Try including Half Dome in a backpacking trip: there are roughly 75 permits held for backpackers per day which are not part of the pre-season lottery. There’s also a daily lottery available (to distribute the available permits from people who have canceled their reservation) – more details about this in our how to get a permit guide.
And even if you still can’t get a permit ahead of time with either of those options, there is still a chance that you’ll be able to get to the top of the cables. You can do the hike anyway and ask others along the route if they have any extra permits available, or you can hike to sub dome and ask the ranger if there are any unclaimed permits available for that day. When we did this hike, a family of 4 was giving this a chance, asking if we had an extra available permit (which we did), plus once we reached the sub dome, some people in our party decided not to summit and stayed behind, so even more spots became available. That whole family of 4 were able to make it to the top that day based on the “leftovers” from other groups.
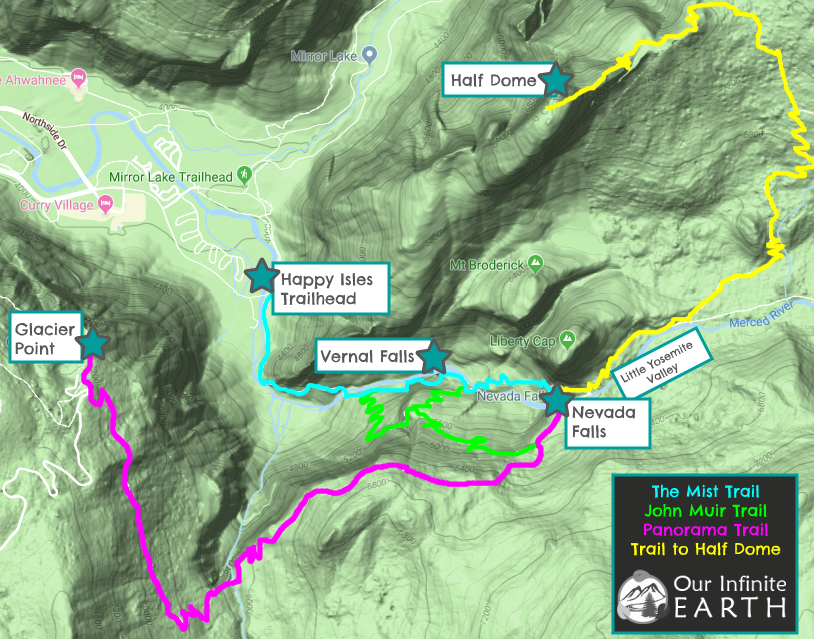
Choosing Your Route & Maps
Congratulations! You got a permit! (Or are going to give it a shot and hike up there anyway crossing your fingers to pick up one along the way) – so now what? Now you have to choose the route you want to take to get to the top. Yes, there are multiple ways to get there. Almost everyone will take the same route, which is up The Mist Trail, since this is thought of as “the trail to get there”, but there are others! So pick which one is going to be best for you and what you want to experience.
All three of the following trails meet at the top of Nevada Falls near Little Yosemite Valley, and then from there, there’s only one trail that takes you to Half Dome itself.
From Nevada Falls (where all 3 trails meet) to Half Dome:
- Elevation of Nevada Falls: 5,971 ft
- Elevation Gain to Half Dome: 2,873 ft
- Distance to Half Dome: 4.4 mi
Pro Tip: Little Yosemite Valley is not the same things as Yosemite Valley (yes, it’s confusing). Yosemite Valley is what you’re probably already familiar with, which is the valley floor of Yosemite where you entered and all of the lodges, campgrounds, parking lots etc. are – it’s the very bottom. Little Yosemite Valley is a valley and campground for backpackers 6,100ft up just past Nevada Falls. You cannot drive to Little Yosemite Valley – you can only hike to it (and if you get a backpacking permit, there’s also the option of camping here during your Half Dome hike).
To Half Dome Via The Mist Trail
By far the most common route to Half Dome, so much so that many people think that this is the only way to get there. The Mist Trail is the shortest route, but it also is the most strenuous in my opinion (get ready for a stairmaster!) and has one of the highest elevation gains.
- Elevation of Trailhead: 4,000 ft
- Elevation Gain to Half Dome: 4,844 ft
- Distance to Half Dome: 7.1 mi
- Elevation Gain to Nevada Falls: 1,971 ft
- Distance to Nevada Falls: 2.7 mi
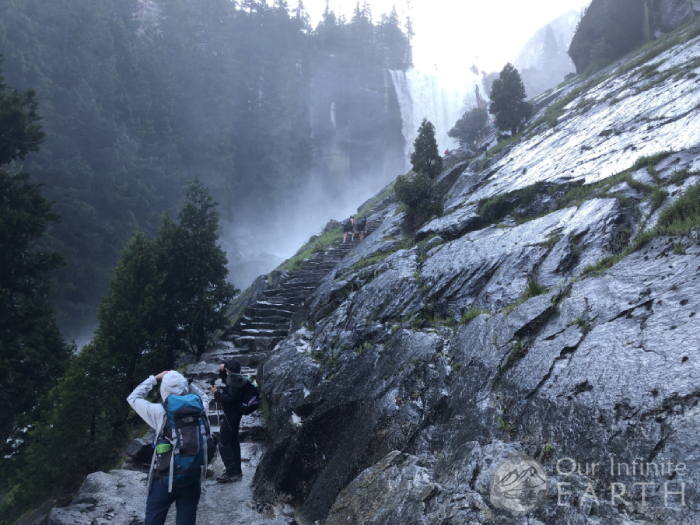
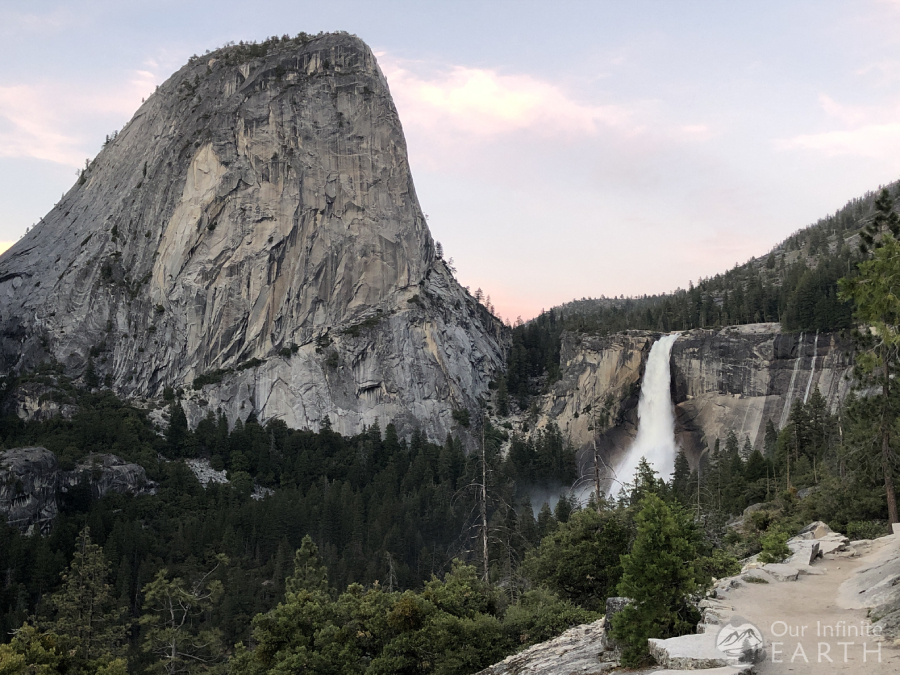
The Mist Trail can be pretty spectacular if you’ve never hiked it, so if you haven’t, then I would recommend this route. You’ll be passing by two 300+ft waterfalls on this trail, getting so close that you’ll be showered by the mist coming off of one of the falls (hence the name Mist Trail). It’s a really unique trail with lots of interesting and challenging features.
Half Dome Via The John Muir Trail
The second most popular trail for getting to Half Dome. The full John Muir Trail is a much longer trail that takes several days to complete, but this portion of it intersects with and follows a similar route as The Mist Trail – it’s just further removed from the waterfalls.
- Elevation of Trailhead: 4,000 ft
- Elevation Gain to Half Dome: 4,844 ft
- Distance to Half Dome: 8.1 mi
- Elevation Gain to Nevada Falls: 1,971 ft
- Distance to Nevada Falls: 3.7 mi
They have the same trailhead and both converge again at the top of Nevada Falls. The main differences are:
- JMT is a series of switchbacks whereas Mist is stone stairs
- JMT does not come in direct contact with Vernal Falls (good if you want to stay dry)
- JMT will add an extra 1mi (one way) to the hike
- JMT does not cross the river and stays on the west side of both falls, providing a spectacular (and in my opinion) better view of Nevada Falls.
It’s very common for hikers to go up The Mist Trail and then down the John Muir Trail (what we did). This gives you something new to look at, plus going down the steep stairs of The Mist Trail, which are often wet, isn’t really my favorite thing… especially at night, which is a very real possibility depending on how long this hike takes you.
Half Dome Via The Panorama Trail
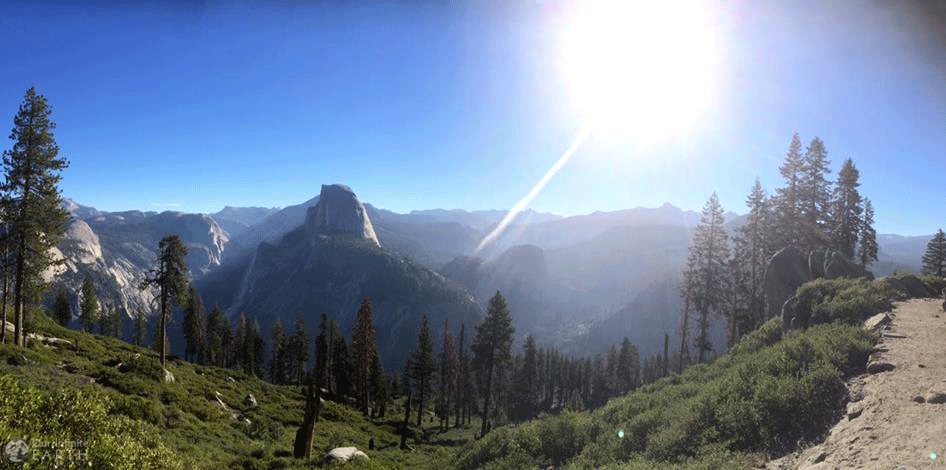
Not a very common route as it’s much longer, but it also has a much lower elevation gain. I personally really like The Panorama Trail – it has great views of The Valley and surrounding areas and is a really pretty trail that’s difficult enough, but isn’t going to kill you.
This trail has a different trailhead than the other two: Glacier Point, which is already high up on the rim above The Valley. As such, the elevation gain for this hike is significantly less than the other trails. The main turn off is the added distance.
- Elevation of Trailhead: 7,214 ft
- Elevation Gain to Half Dome: 1,630 ft
- Distance to Half Dome: 9.9 mi
- Elevation Gain to Nevada Falls: -1,243 ft
- Distance to Nevada Falls: 5.5 mi
If you are good with long distances and not so much with elevation gain, this is the trail for you. Another option (which is a route I’d really like to try and think would be the most enjoyable way to do this hike) is to go up to Half Dome via The Panorama Trail, and then go down via The Mist or JMT. You would just need to have two cars for this trail – one to leave at the bottom of The Mist Trail for when you’re finished, and another to get you to the trailhead at Glacier Point. There is a tour bus that will take you from The Valley Floor to Glacier point, but this operates on a set schedule and you need to buy tickets in advance, which can be difficult if you’re not sure when you’ll be finished with the hike or if it takes longer than you expect.
Getting to The Trail Head & Parking
If you’ve chosen The Mist Trail or John Muir Trail, the trailhead is located at Happy Isles in Yosemite. You can’t drive all the way to Happy Isles and there’s no parking there even if you could. The closest parking area is a lot on the right as you’re approaching the trailhead:
This is a pretty big lot and should be able to accommodate all half dome hikers (all 300 for the day). From here, it’s a short .5mi walk on the paved shuttle bus road to get to the trailhead.
If you’ve chosen the Panorama Trail, the trailhead is located at Glacier Point, up above the valley floor. There is a large parking lot at Glacier Point with plenty of room for leaving your car. Glacier Point Road is the only way to get to this point, and is a long winding road along the rim:
What To Expect Along The Trail
No matter which of the above routes you choose, they’re all amazingly picturesque and beautiful trails. Yosemite is one of the most beautiful places on Earth in my opinion, so no matter where you are, it’s going to be amazing. Here are in depth trail reports on what you can expect on both The Mist Trail and The Panorama Trail.
Once you reach Nevada Falls where all of these trails converge, then there’s only one trail to get to Half Dome. There’s a latrine at the top of Nevada Falls (if you’re coming up the JMT or Panorama, you have to cross the river to get to it), continue to follow the trail past the latrine towards Little Yosemite Valley.
 If you’ve come up The Mist or JMT, this is the “half way point” of your journey. (Note that if you’re planning on going down via JMT or Panorama, you’ll have to cross the river here on your way back – there are stepping stones to get across – rather than following The Mist which goes back down on the same side of the river without crossing).
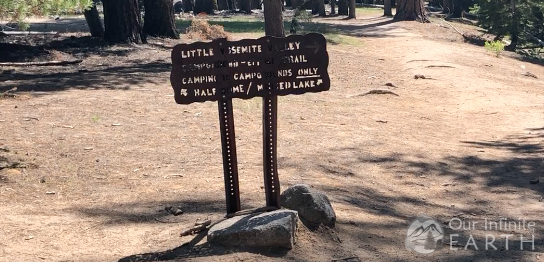
The path after the latrines is almost cobblestones as it goes through a few switchbacks before leveling off as you reach the valley. It’s about a mile from the latrines to the end of Little Yosemite Valley. The path through the valley is mostly a flat packed dirt path that follows along the river. Make sure to stay to the left towards Half Dome rather than the right which goes to the campgrounds (there are signs).
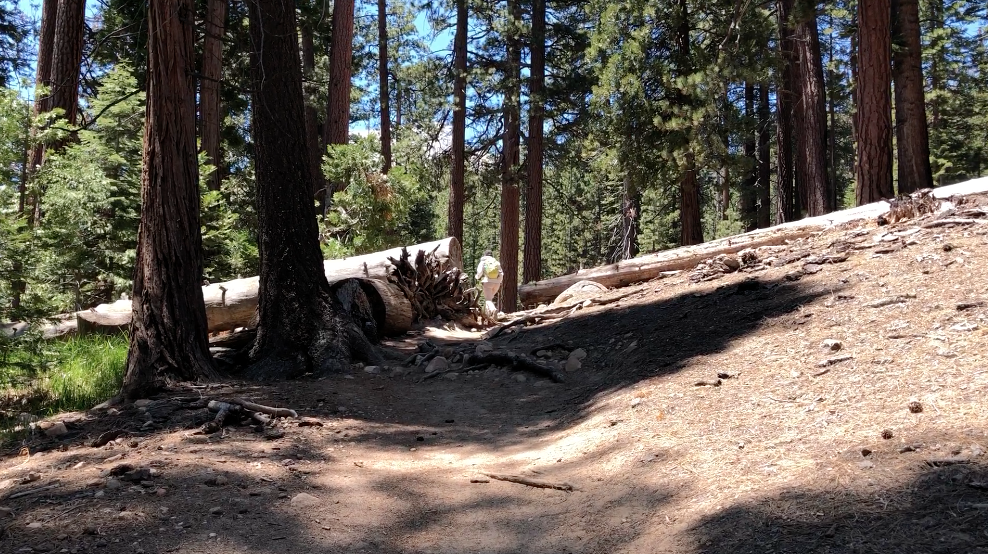 After the end of the Valley it’s time to start climbing You’ll be climbing almost 3,000ft over the next roughly 3.5 miles following continuous switchbacks through the trees…. it’s a relentless uphill climb. If you’ve come up The Mist or JMT, you’ve just climbed roughly 2,000 ft in less than 3 mi, now you have to do that all again plus an extra 1,000 ft and in roughly a similar distance (just to put things in perspective).
If you’ve come from The Panorama Trail, you’ve been going downhill thus far for the majority of your journey and, so now it’s time to go up, up, up! I thought this section of the hike was the most difficult… until I got to the sub dome….
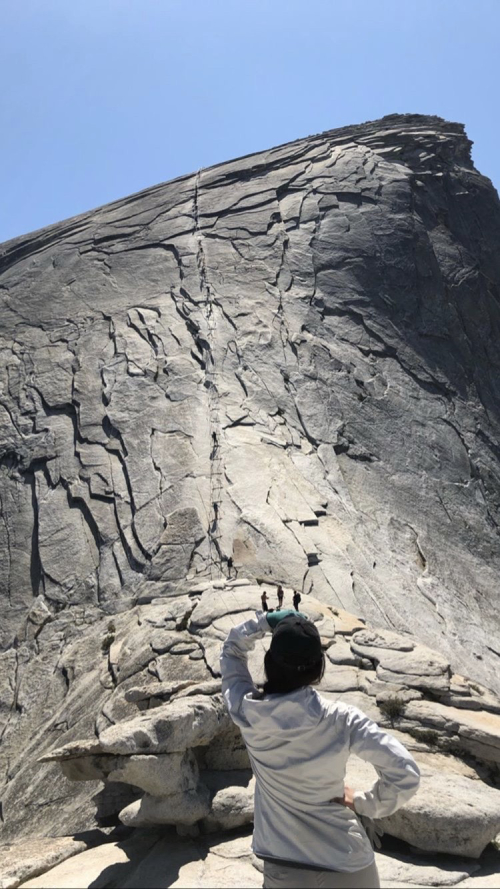
You’ll get glimpses of the back side of Half Dome during this trek as you’re getting closer. The closer to the top, the less trees there will be. The last section before the sub dome is across bald, treeless rock slabs. You feel like you’ve made it and are almost there! But don’t get excited just yet, this section on top of the rock is longer than you think and you’ll probably see several other hikers sitting around resting up for the next part of the journey.
Just before you reach the sub dome, there will be a ranger with a clipboard waiting to check in your group and confirm that you have a permit. From here you’re now ready to tackle the sub dome and the cables – now, you’re almost there!
The Sub Dome
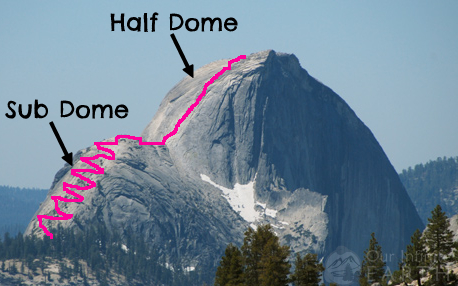 Before you even get to the cables on the dome, you have to go through the sub-dome, which seems to be often overlooked since you’re so close to the top! The sub dome is difficult – one of the most difficult parts of the entire trail. Plus, you’ve already come so far and are now tired and at over 8,000ft in elevation. It’s a tough trek up even more stairs! (If you took The Mist Trail, you’re gonna have such a great ass after this hike!)
The steps here are huge – bigger than most on The Mist Trail, and given the elevation, you’re going to get out of breath often. Be prepared to need to take lots of stops. The sub dome itself might take you an hour to complete.
Tips For Hiking The Cables
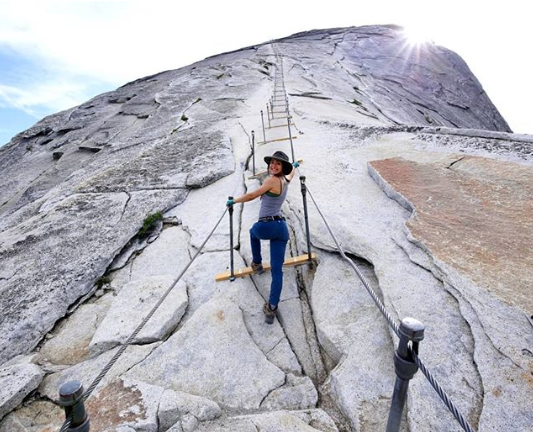
The cables are the last 400 ft to reach the summit and are technically the only part that you need the permit for. Once you reach the subdome, you’ll have to show your permit reservation/confirmation to the ranger who has a list of names for all of the permit holders that day.
- All members of your party must be present at the same time to use the permit. Once the permit has been used, that’s it, it’s done – even if it was just one person and you had a reservation for six. Everyone on the permit who is climbing the cables needs to be there together at the time the permit is redeemed.
- Wear gloves! The cables are steep and you’re going to need to pull yourself up using your upper body. As such, having a good, comfortable, strong grip on the metal cables is very important. I highlight suggest using Mad Grip Gloves for going up the cables. These are cheap ($12) gardening gloves, but they are SUPER grippy – even more so than many other expensive options. If you don’t go with these gloves, make sure whichever ones you use have a rubber sole so that the cables don’t rip through the fabric of the gloves.
- Use your upper body. After the hike to get here, you’re going to already be tired, but this is actually one of the hardest parts of the hike because it’s a full body work out at a high elevation. Use your upper body to pull yourself up the cables and be prepared to get tired in the process – it’s a work out!
- Take breaks. Even if you had the physical ability to do this entire section in one sprint, you’re likely not going to be able to since there will be others ahead of you on the cables. You’re going to have to take breaks, let other people pass you on their way up/down etc. Most of the time you’re going to want to have one hand on each cable, which obviously prevents anyone from being able to pass you. When taking a break or letting someone pass, try to stop on one of the wooden boards across the rock which will give you more footing, and switch so that both hands are on just one cable.
- Avoid the crowds. Get there early or get there late to avoid the crowds. Peak cable time is 11-4pm and there can be long lines waiting to go up if you’re there at the wrong time. If you can arrive outside of that time period, it will better your chances of not having to wait to long before, after, or during the cable hike.
- Don’t go backwards! On your way down, it’s tempting to turn around and go down backwards since you’re so high up and it feels more reassuring on the steep rock. Try not to do this – it’s more dangerous. You can’t see where you’re going or if someone is coming up behind you. It can be dangerous to yourself and others.
Water Sources
Given the length of this hike, you’re probably going to need a water refill at some point during this hike. It’s recommended that you drink approximately a liter of water every 2 hours to avoid dehydration. That’s at least 5 liters you’d need for this hike if you’re following this guidelines.
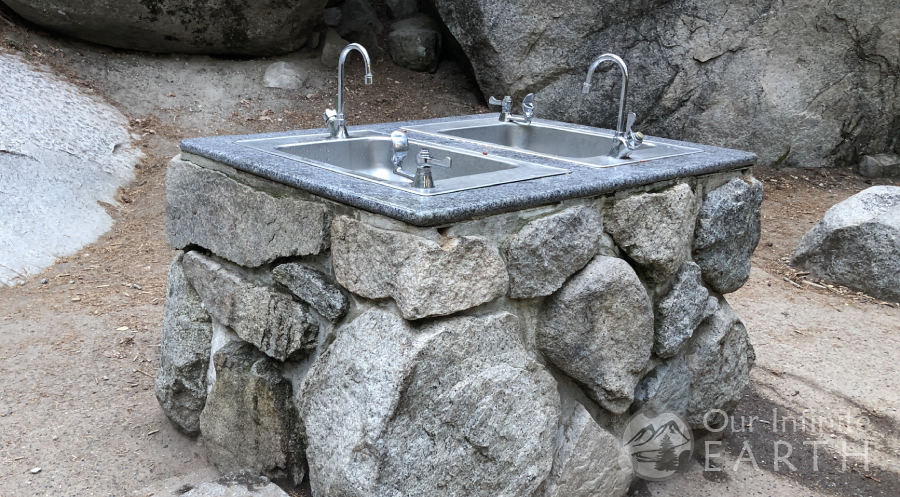
There’s a water faucet and sink with fresh water at the latrines at the top of Nevada Falls. However this was BROKEN during our trip, so don’t rely on this.
Your last reliable water source is the river in Little Yosemite Valley before heading up the steep trail to Half Dome. But this water needs to be purified – don’t drink straight out of the river. This can be done using purification tablets that you can drop into your camel pack or a filtered water bottle.
There may be some small streams of running water coming down the mountain side as your climb depending on the snow melt, but don’t count on this.
I was also told by another hiker who has done this hike several times that there’s a freshwater spring at the end of the trail in Little Yosemite Valley before you start to climb, but I wasn’t able to find it.
If you’re coming up The Mist or JMT, there’s also another faucet with water at the latrines at the Vernal Falls Footbridge, which are .75mi into the hike. Not much help since it’s so close to the beginning of the hike, but it’s there if you need it.
Weather
Make sure to check the weather and be on the look out for rain clouds as you’re hiking. If there is a threat of rain, you should not go up the sub dome or the cables. Rain can make the stone of Half Dome very slippery and dangerous to climb. It can be heartbreaking to come all this way and then not summit due to weather, but it’s much better to be safe than sorry. There had even been 2 deaths from a lightening strike at the top of Half Dome.
Backpacking to Half Dome
If you’re looking to break up the trek rather than doing it all at once or didn’t get a permit ahead of time and are looking for another option, backpacking maybe a good way to go. Or you might just want to add Half Dome to an already planned backpacking trip. There are roughly 75 permits held for backpackers per day that day hikers aren’t able to make reservations for.
If you want to include Half Dome as part of a backpacking trip, you still need to get a wilderness permit as you would with any other backpacking trip in Yosemite. The only difference here is that when filling out and sending in the form, be sure to specify that you want Half Dome permits as part of this backpacking trip. If your backpacking route goes past Half Dome and if there are still backpacking permits available, then you might be able to get a Half Dome permit as part of your backpacking permit.
Depending on your backpacking route, if you’re including Half Dome in your trip, you’ll likely want to set up camp the night before in Little Yosemite Valley. This puts you just roughly 3.5 miles and 2,000 ft from the top of Half Dome (and you might want to check our nearby Cloud’s Rest while you’re in the area!)
What Gear Should I Bring?
In addition to our standard list of what to wear hiking (which includes basics like boots and tops), here are some additional items that you should bring for this hike specifically:
Gloves: Mad Grip Gloves
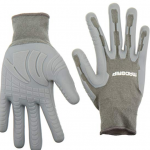 Gloves are super important for climbing the cables. These are cheap ($12) gardening gloves that are SUPER grippy and will help you stick to the cables available here. If you don’t get these gloves, make sure that whichever ones you do get have a rubber sole which will be making contact with the cables so that they don’t get torn up by the cables. Gloves really are an absolute must, you’re really gonna regret it if you don’t have them!
Water Purification: Purification tablets or a filtered water bottle
You’re going to need more water than you want or are able to carry. Don’t rely on the water stations by the latrines (which were both broken during out trek). This will allow you to refill and drink directly out of the river or streams as needed.
Rain Gear: jacket and pants
If you’re taking The Mist Trail, you’ll want at minimum the jacket. Depending on water levels, how much it snowed, and how much that snow has melted, you’re either going to get rained on or get drenched – either way you’re going to get wet. I’ve hiked The Mist Trail several times – the majority of those times, I just got a little wet and it was refreshing especially on a hot day. When we hiked Half Dome, we got DRENCHED on The Mist. There was so much water that there were literally streams coming down the stairs. I wore a rain jacket, but no rain pants and regretted it as my pants and even socks were completely water logged for the rest of the hike.
Headlamp: GearLight LED Headlamp
More than likely you’re either going to be going up or down in the dark during this hike, at least partially. Our group woke up at 3:30am, started hiking at 5:30am, and finished at 9:30pm… we needed headlamps.
Trekking Poles: TrailBuddy Trekking Poles
Optional depending on your hiking preference. The majority of the trails you’re going to be hiking on are steep, which trekking poles can really help with and take a lot of pressure off of your knees.
Camera: Go Pro
How else are you going to take photos while on the cables?! I wouldn’t trust taking out your phone to take photos up there. Two people in our group brought Go Pros (one owned, one borrowed) and they were the main photographers on the trek, especially on the cables and on the top of Half Dome.
Extra Pair of Socks
I didn’t bring this since I thought it was unnecessary and I regretted it. If The Mist Trail is raging, your socks are going to get wet along the trail and you’ll want to change. You might also want to change on the way down just for comfort to have a nice fresh pair of socks.
