


If you like mud, rivers, slot canyons, awesome rock formations, and a vastly varied beautiful landscape, then this trip is for you! Paria Canyon offers some really amazing slot canyon hiking with a vast variety of terrain.
The landscape and hiking here is similar to the Zion Narrows, but with almost no people (only 20 overnight permits per day). There are incredible geologic patterns and colors throughout the entirety of the canyon with walls range from 100-500 ft tall. There are several different routes available for backpacking through the canyon (detailed below), and you’re in for a real adventure with every one!
Overview:
- Distance: 6-51 miles – varies based on route
- Type: Thru Hike (could make it out & back)
- Days Needed: 2-5, varies based on route
- Elevation at trailhead: Roughly 4,200 feet
- Elevation Gain/Loss: -500-1500 ft, varies depending on route
- Difficulty: Moderate- Difficult
- Crowd Factor: Low
- Best Time: April- Early May
- Permits: Yes, competitive
- Reliable Water: Yes
Where is Paria Canyon Located?
Located in the Vermilion Cliffs Wilderness of the Colorado Plateau in Utah and Arizona. It runs along the boarder of both states, more towards the western half of each following along the Paria river. This area is most famously know for The Wave, which is almost impossible to get permits for. It’s also super close to Horseshoe Bend and Antelope Canyon. If you’re planning a trip here, I recommend seeing all three as they are literally within an hour of each other.
When Is The Best Time To Go?
The best times to visit are April- early May and September-November when the temperature is cooler. Summer hiking can get very hot (into the 100s) and the risk of flash floods is higher. I’ve done this hike twice – once in early May (3-5) and then in late May (over Memorial Day), and it was a VERY different hike both times.
The end of April/early May is definitely the most preferred time to do this hike. Temperatures are cooler during the day, but also not too cold at night. Most importantly, there’s still water in Paria Canyon. When doing this hike at the end of May, there was no water in the canyon until after The Confluence. Hiking 8miles from White House to The Confluence (mostly through sand since there wasn’t water), wasn’t much fun. The water in the canyon when we did this hike in early May made it much more enjoyable and picturesque.
Permits & Costs
Advance PERMITS ARE REQUIRED if you’re backpacking, there are no walk-in permits for overnight use. They are limited to 20 people per day, making them highly competitive.
The online permit application form is available here, however given how quickly these permits go, I recommend reading our detailed guide for getting a permit, which includes some time saving tips to help get you the dates you want:
Costs
- $6.00 per person per day – for day hikes
- $6.00 per dog per day – for day hikes
- $5.00 per person per day – for overnights
- $5.00 per dog per day – for overnights
Unless you are able to leave a car at the exit, more than likely you are also going to need to hire a shuttle to take you from your exit point to your entry point (or vice versa) in order to pick up your car. (See More Below)
How Long Does It Take to Hike Paria Canyon?
This is going to depend on the route you decide to take through the canyon. Hiking the entire canyon from Whitehouse to Lee’s Ferry usually 4-5 days. Then if you also want to day to do a side trip into Buckskin Gulch (which I definitely recommend), you might want to add another day to your trip.
Choosing Your Route
You can pretty much mix and match any of the trailheads to create whatever route fits you best. Regardless of which route you take, you’re going to be following a river, crossing it several times, which means lots of mud and water.
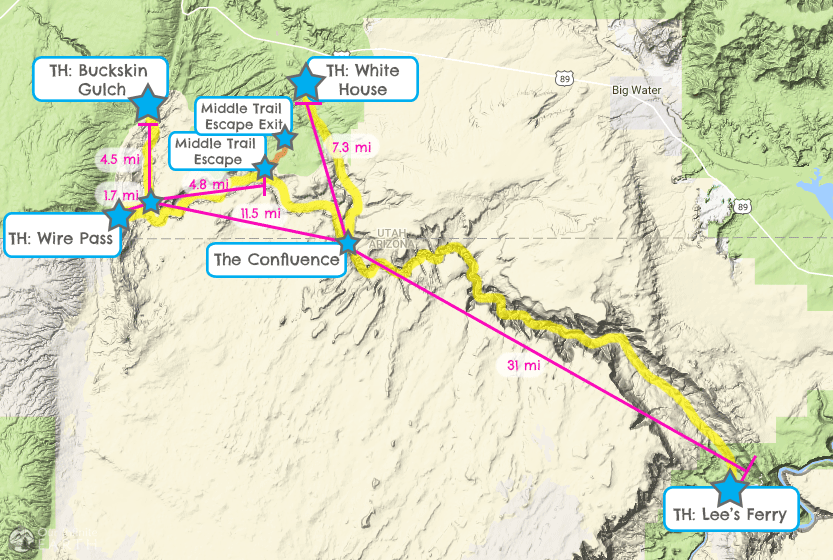
Points of interest and mileage:
- White House Trailhead to The Confluence: 7.3 miles
- Buckskin Trailhead to The Confluence: 16 miles
- Wire Pass Trailhead to The Confluence: 13.2 miles
- Wire Pass Trailhead to Middle-Out Escape Exit: 6.5 miles
- The Confluence to Lee’s Ferry: 31 miles
Day Hikes
The BLM does not limit the number of day-use access passes (unlike the 20 person overnight limit), which makes this a great option for those who want to see this area but were unable to get an overnight permit. You do still need to get a day-use permit and leave it in your car, which can be accessed via self-serve envelope stations at the trailhead.
Whitehouse Trailhead to The Confluence (and back)
- Distance: 14.6 miles round trip
- Elevation Gain/Loss: 180 feet
- Difficulty: Moderate
- Crowd Factor: Low
- Water: Seasonal
For a day hike, you can hike the first part of Paria Canyon from the Whitehouse trailhead to The Confluence (where it joins with Buckskin Gulch) and then back again. This will still give you a great look at some amazing canyon walls and beautiful pastel rock colors.
If you’re looking for some other options for day hikes in this area, Buckskin Gulch also offers some options. Learn more about day hikes via Buckskin Gulch here.
Weekend
White House to Wire Pass (2 Days, 1 Night)
- Distance: 20.5 miles one way
- Elevation Gain/Loss: -180 ft, then 720 ft gain
- Difficulty: Moderate
- Crowd Factor: Low
- Water: Yes, unreliable
This hike could also be done as a day hike if you think you can manage the distance! Starting at the White House Trailhead, you’ll enter to Paria Canyon, go to The Confluence and then hike up through Buckskin Gulch on your way out. Choosing this route (or vice versa), you get to experience the most impressive parts of both the Paria Narrows and Buckskin Gulch.
Both of these trails are pretty flat and you don’t feel much like you’re hiking down hill either way, so whichever direction you choose is really up to you. One thing to keep in mind is that Buckskin is shaded almost all day whereas Paria is not, so you may want decide where you’re starting based on trying to avoid the sun. There are several campsites near The Confluence which can be used as the spot for your overnight if choosing this route.
3+ Days
White House to Lee’s Ferry
- Distance: 38 miles one way
- Elevation Gain/Loss: -1,130
- Difficulty: Moderate
- Crowd Factor: Low
- Water: Yes, reliable
While you don’t travel directly through the gulch, you still get a lot of what this canyon has to offer, including a wide variety of different types of terrain. You’ll go through the Paria Narrows (as narrow as 5 feet in some places), which gives you the slot canyon experience, and also through the desert portions of the canyon towards the end. It’s a slightly easier and shorter route than the next one listed here.
Learn more about multi-day hikes starting in Buckskin Gulch here.
Pros & Cons of Hiking Through Paria vs. Buckskin

Pros
- Change of Scenery – Much of Paria before and after the confluence has very similar topography, where as Buckskin is very different from Paria.
- Bragging Rights – Buckskin is one of the longest and narrowest slot canyons in the world and has a reputation for being extremely grueling and difficult.
- Temperature – Because Buckskin is so narrow, it doesn’t get as much sun and is noticeable cooler than Paria. There was a cool breeze coming through the Gulch when we visited and no direct hot sun up above. However, this also means the water you’re walking through is MUCH cooler as well.
- It’s Just Awesome – let’s face it, Buckskin is just cooler than Paria, for many of the items mentioned above. There’s an ominous foreboding tone to the canyon and you feel like you’re walking into a tomb that no one has visited before. It’s really awe-inspiring and unlike anywhere else in the world.
Cons
- Boulder Blocks – yep, big piles of rock boulders that you have to scramble over to continue through the canyon.
- Chest-deep Water – not all the time, but enough of the time that it can be a turn off. The water in Buckskin is much deeper than Paria. You should expect to be knee or waist deep in water at a minimum regardless of when you go. (When you pick up your permits at the BLM, they will tell you the current water levels you can expect).
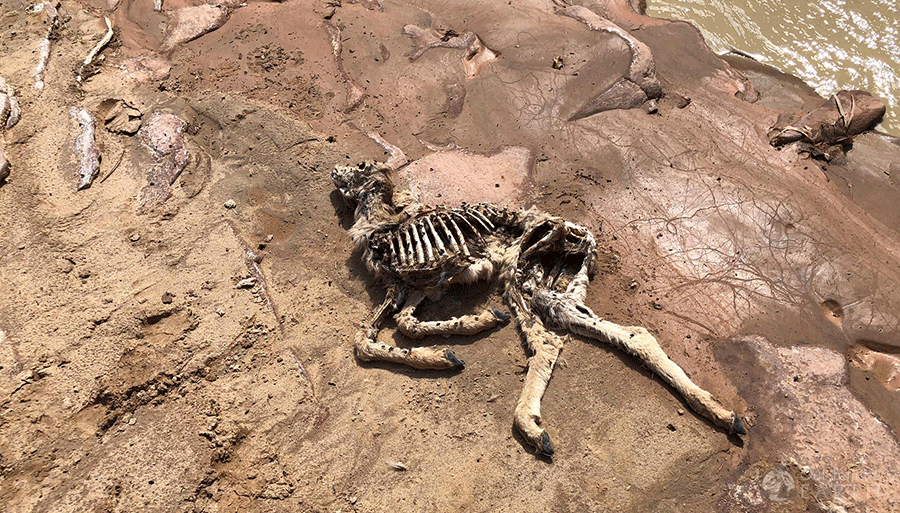
- Stinking Cesspools – these ebb and flow a bit depending on the time of year. Since the Gulch doesn’t get much sunlight and the water doesn’t move quickly like it does in Paria (which is actually a river), the pools of water in Buckskin get smelly… like really smelly – gross stagnant water that may or may not have dead decaying deer carcasses floating in it (true story).
- Flash Floods – while this is a concern in both canyons, it’s much more of a concern in Buckskin since it’s so narrow. In Paria, you’d have a fighting chance but in Buckskin, you’re pretty much screwed.
- Quick Sand – again a concern for both canyons, but more so for Buckskin, and with no way around/out, if you’re stuck that’s all folks!
- Distance – Once you’re in, you’re in. There’s no place to camp in the Gulch.
Why We Chose White House to Lee’s Ferry
- (See Above) Wire Pass and Buckskin Gulch are much narrower than Paria Canyon, and while that makes it more interesting, it also has deeper water and large boulder obstacles that you need to climb over. This increases your danger in a flash flood and also, when carrying a backpack, this makes your first day really difficult on top of the long mileage.
- Buckskin Gulch or Wire Pass trailheads also add a lot of miles to your first day. There is no where to camp until you reach the Confluence, which from Wire Pass is double the distance of White House to the Confluence.
- Once you reach the Confluence, you can camp just past it on the first night and take part of the day to explore Buckskin Gulch with just a day pack (which is what we did). You can explore the gulch and turn back at any time rather forcing yourself to get through waist-deep water if you don’t want to.
- The difference in the width between hiking the Paria Narrows vs. Buckskin Narrows is at most 3-4 ft, so you still get a great slot canyon experience either way.
If I Could Do It Over Again:
The first time we did this hike (May 2-5), we went from White House to Lee’s Ferry in 4 days. After that, I thought that it would instead to better to NOT hike all the way through to Lee’s Ferry and instead to go back out to White House.
Thoughts from this first trip: Once you hit mile 14 or so, the canyon has widened considerably and there’s little to no shade for pretty much the rest of the hike. The last 10 miles especially is wide open desert with precarious lose rock formations you’re walking up and over. It feels a lot like being a Hobbit on the way to Mordor. We got VERY lucky in that the last 2 days (19miles) were overcast and in the high 70s. If not, this part of this hike would have been BRUTAL.
Because of this, the second time we did this hike (Memorial Day), we did this instead:
- Day 1: Enter at White House. Hike through the Paria Narrows and set up camp at one of the sites past the confluence.
- Day 2: Spend the day exploring Buckskin Gulch. You can go as far as you like and turn back at any time if it gets too gross or rough.
- Day 3: Explore down Paria Canyon. There’s still some really interesting beautiful things further down the canyon from the confluence which is worth a look and you can see it without being forced to trek through it, with the option to turn back at any time.
- Day 4: Go back out Paria Canyon to White House. Yes, you’re seeing the same thing twice, but it’s really quite beautiful and is worth a second look 🙂 Plus, then you don’t need to worry about a shuttle to get from one trailhead to another.
But honestly, I can’t say that this was really any better. The hike back to White House was more shaded, which was great – BUT, partially due to the time of year and the river being dry, almost the entire hike back was through SAND….ugh! Roughly 8 miles through sand carrying a pack is no fun. You’re doing twice the work with half of the pay off. Having hard pack under your feet makes such a big difference on this hike. Even though there wasn’t any shade on the last 10miles to Lee’s Ferry, we made a lot better time and it was less physically taxing than this 8 mile back through sand.
Pro Tip: If you really want to go all the way through, I strongly recommend taking 5 days instead of 4 like we did. Having to hike 9-10 miles a day was tough on us and we were too tired to do much extra exploring of things like the Petroglyphs, which I wish we had more time to explore.
Shuttle Options
In order to complete most of the backpacking routes listed above you’ll need to use a shuttle service to get you back to your car or vice versa. The majority of backpackers start at either White House or Wire Pass and then exit at Lee’s Ferry. There is a 14-day parking lot at Lee’s Ferry, making it an easy place to leave your car.
Pro Tip: Leave your car at the exit and take a shuttle to the entrance. Then you don’t have to worry about the timing of exiting the canyon in time to catch your shuttle.
We used Tim from Trail’s End Shuttle who was really wonderful.
Two other options are: Seeking Treasure Adventures and Grand Staircase Discovery Tours
Safety & Weather
There are some very real dangers when hiking through these canyons. More so for Buckskin Gulch because it’s narrower and longer than Paria Canyon, but these warnings apply to both.
Flash Floods
Check the weather before you enter! This area is prone to fast and deadly flash floods Paria canyon is do-able if there’s a bit of rain. The most narrow section is probably 4-6ft wide and once you’re past The Confluence, there’s lots of grassy/sandy areas up on the river banks where you could go if there was a flash flood. It’s still a good idea to be vigilant about this even if it’s not a super high danger.
Quicksand & Sticky Slippery Mud
The advice we were given by the BLM was that quicksand likes to hang out “in the corners”. So that’s what we avoided – any edges or corners with rocks or canyon walls. Essentially, if you’re going straight down the middle and staying out of the pockets, you should be pretty safe from quicksand.
There’s going to be mud, and lots of it, especially once you get past The Confluence. The majority of it is pretty slippery, roughly the consistency of pudding, and you can pull your foot out. There are some sections however where the mud is more aggressive and more sticky. These thicker mud pockets aren’t quicksand, but they can still grab you and suck you in. I got stuck in one section where I couldn’t get enough force to pull myself out without a steady helping hand. Pay attention to the footprints of the people who came before you (there will be lots) in order to get an idea of how far into the mud you can expect to sink.
Tips for Crossing The River
Look to cross the river at places where you can see the water moving. Flowing water is a good sign that there’s no quicksand underneath. Also, try to cross in areas where there are some rocks since again rocks = no quicksand. That being said, you don’t want to stand in the middle of flowing rapids with a sandy/muddy bottom for too long either. As you stand still in the river, the currant washes away the sand from under you causing you to sink, so make sure to keep moving.
For anyone who didn’t grow up playing in streams as a kid like I did, funny things can happen around big rocks when in the water. The area surrounding big rocks tend to be deeper and muddier than others, so again, best to avoid. The spot where I got stuck in the mud and was unable to get myself out as mentioned above was in trying to pass between two large sized rocks.
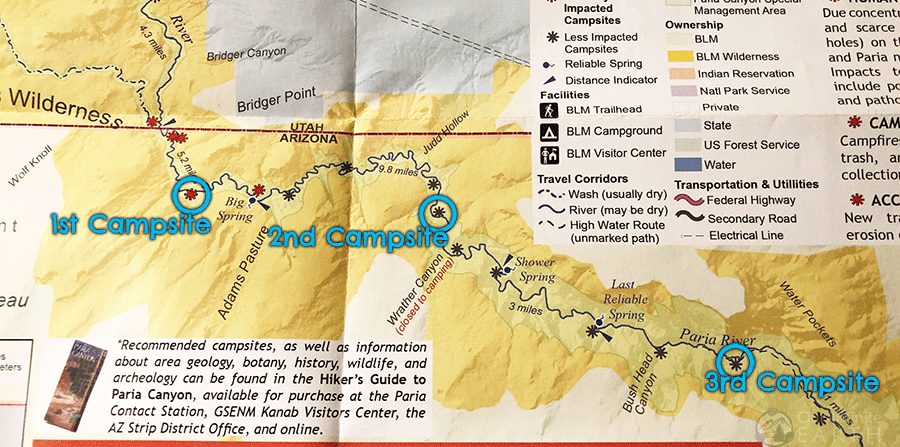
Maps
The BLM will provide you with a map when you pick up your permit. This is the most up to date map with available campsites etc., but I found another map online that I thought was much more detailed and helpful:
I used a combination of both of these for our trip – the BLM map to show where the campsites are, and Tom’s map for other landmarks and mileage markers (such as the Petroglyphs, additional “non reliable” springs, or the power lines that cross the canyon at Mile 2).
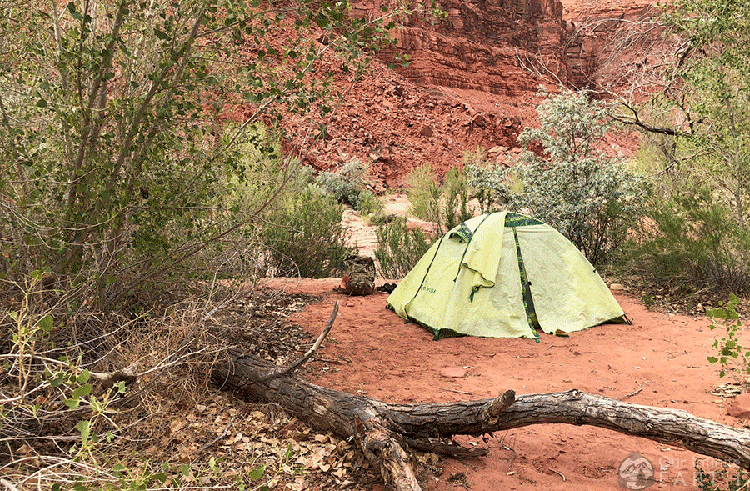
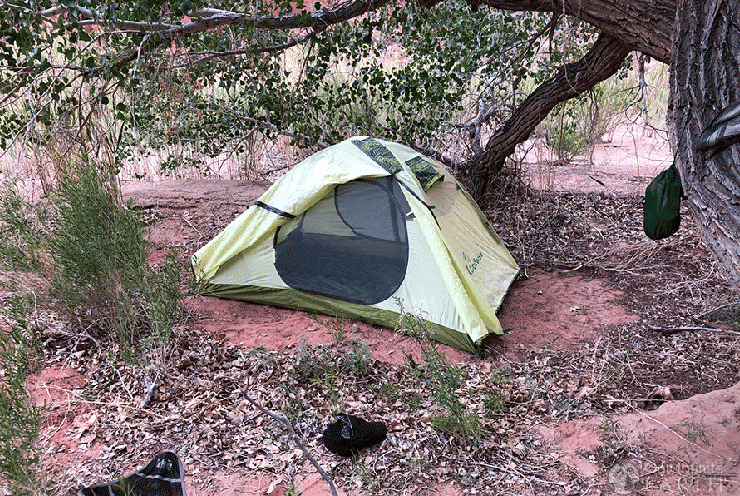
Campsites
There are lots of places to camp once you get past the Confluence. It’s kinda a free-for-all honestly. Yes there are marked campsites on the BLM map that you should adhere to since these have already been impacted by humans and are more easily accessible, but really there’s so many river banks where you could set up camp if you need to.
The BLM campsite map mostly just gives you a good idea of the areas where there’s going to be enough solid ground to camp so that you can gauge these distances effectively.
The campsites closer to the confluence are more obvious as more people have used them, but further into the canyon some of the sites becomes harder to spot. I honestly can’t even tell you if the place we camped on the second night was a designated campsite or not even though that’s what we were aiming for.
Water Sources
There are so many fresh water springs and seeps! Especially if you go earlier in the year. I was really nervous about knowing exactly where all of the reliable springs were before we left, but as it turned out, there were so many springs when we did this in early May that I mistook some of them for being the marked reliable springs. When we did this trek again in late May, some of these little seeps had dried up, but a few of them and the reliable springs were still there.
Between 2 and 13 miles after the confluence (at least in May when we went) there were plenty of opportunities for fresh water, some better than others. The reliable springs were flowing strongly and steadily whereas some of the other seeps where barely dripping, but either way there were options.
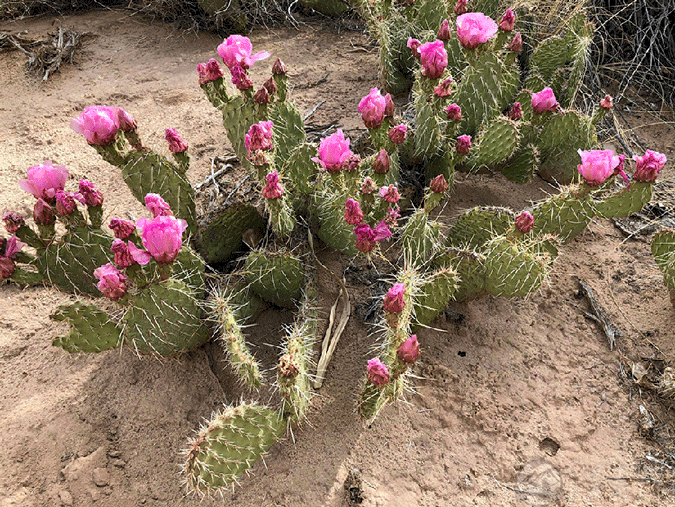
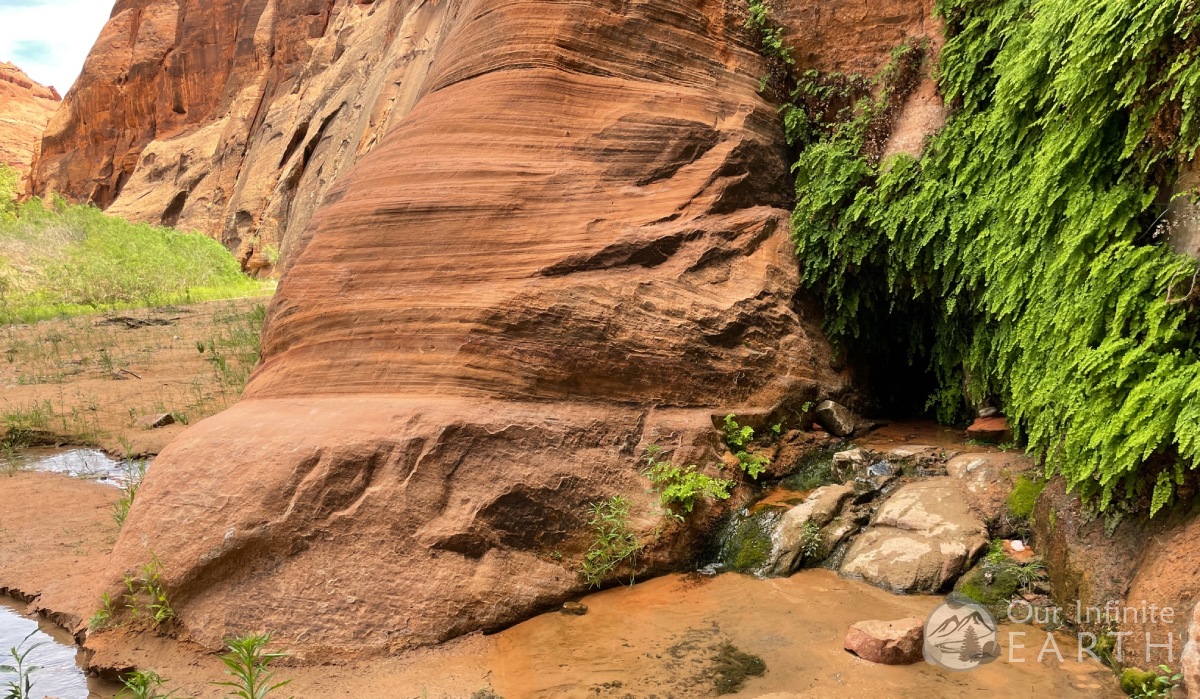
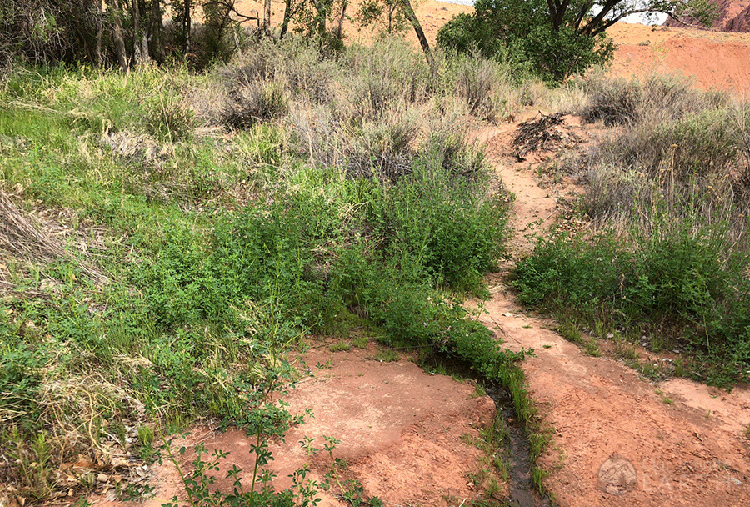
Some of them are very obvious and hard to miss, whereas others are a bit more hidden. But ALL of them have this plant growing around the spring:
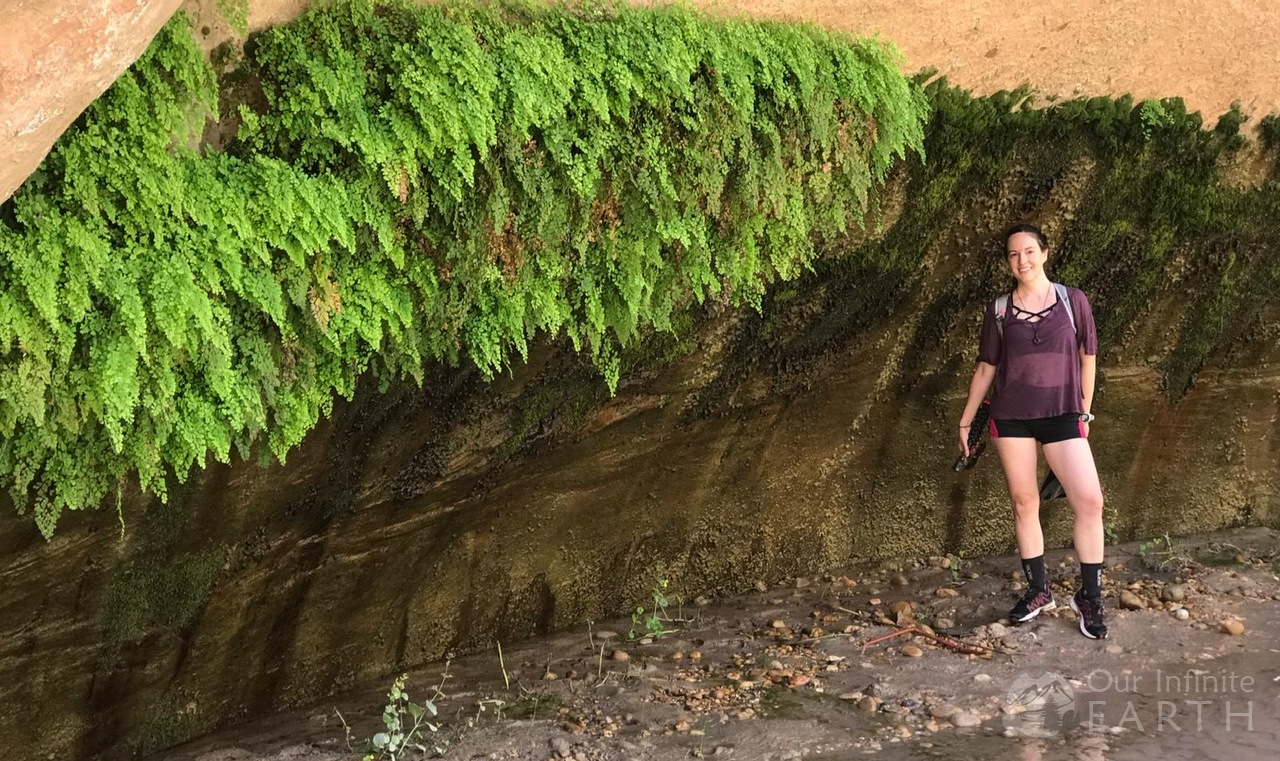
In some cases, the seep is literally coming right through the cracks in the side of canyon wall. For these, the fresh water collects in pools below the seep. As long as there wasn’t any algae or anything growing in the pools, we scooped the water right out of it and that worked just fine. We purified everything regardless just incase.
If you see green on a canyon wall, that’s probably a spring!
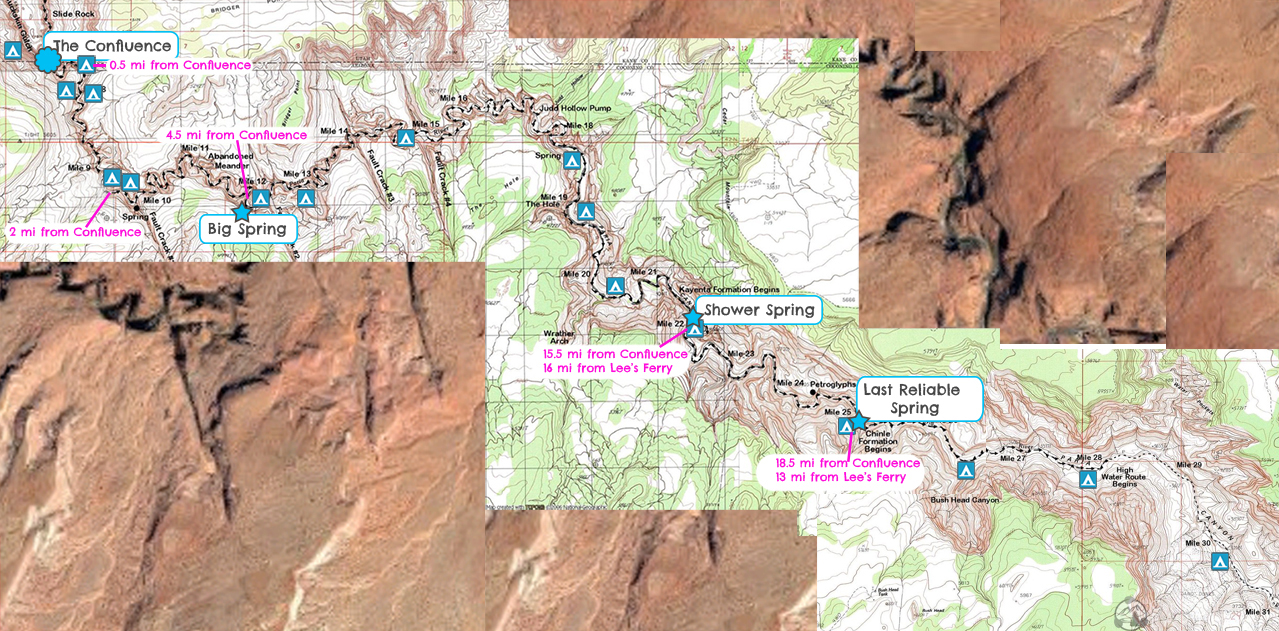
- Big Spring – 4.5 miles from The Confluence

- Shower Spring – 15.5 miles from The Confluence (on the right side, hidden in some rocks)
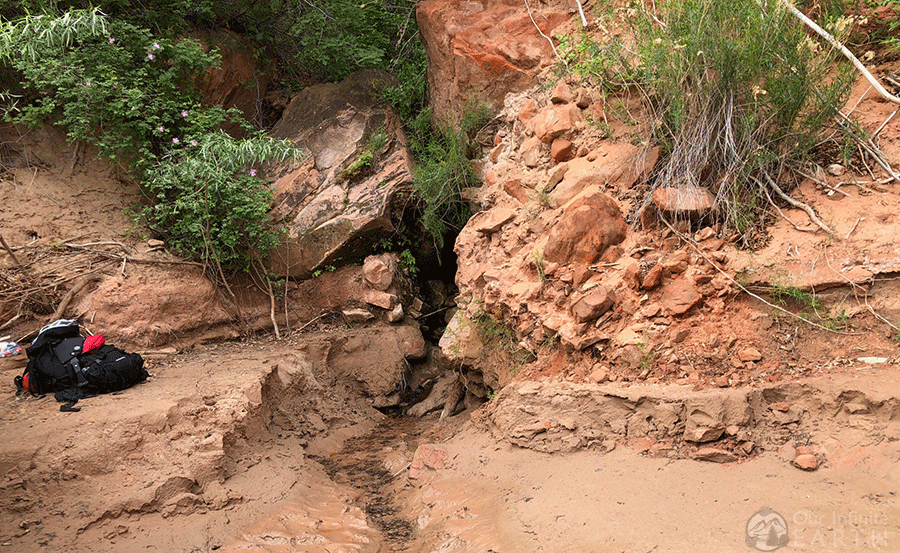
- Last Reliable Spring – 18.5 miles from The Confluence (on the left side, hidden behind some boulders and ferns, across from a large campsite)
There are a few other springs/ seeps we found:
- Roughly 3miles past the confluence is a “spring”, which is on the right sort of hidden behind a rock. This spring is a bit murky, but is big enough that I confused it for the “Big Spring” the first time I saw it. Also both times we did this hike in early and late May, there was a seep available on the canyon walls just 2 river turns before this.
- A small seep shortly past Judd Hollow’s Pump
- A small seep on the left side of the river at the bend just before the “Shower Spring”.
- Between “Shower Spring” and “The Last Reliable Spring” there were several springs on the right side of the river up a bit from the canyon. You might have to climb a little to get to them, but it could be done.
- A small spring/pool at the campsite at Bush Head Canyon.
- Two small spring at Wilson’s Ranch (8.5mi after the Last Reliable Spring). These were a bit muddy and came out of the ground, but would work if you were really desperate.
Pro Tip: Fill up at the “Big Spring” as there aren’t as many small seeps between that and the next reliable spring. Also, make sure to fill up at “The Last Reliable Spring” even if you don’t think you need to. The last 10 miles of your hike could be brutally hot and you’re going to need that water.
Since you’re following the river, you could also drink from it if you really want to with purification tables and a filter. The river is very silty and some hikers have had difficulty with osmosis filters getting clogged (but did have luck with ceramic filters that can be scrubbed clean between uses). Also as it’s a river, there are animals that live upstream, so purification would be necessary.
Backpacking Gear
In addition to our:
These are the items that you’re gonna need on your trip:
Water shoes: Rubber Sole Mesh Water Shoes
The first time we did this hike, I literally wore my hiking boots for only the first 3mi out of the entire trip. After that, we were walking through water the entire time. So rather than be stuck in wet hiking boots, water shoes provide a good quick-dry alternative while still maintaining a grip. The second time we did this trip in late May, I left my hiking boots at home and only brought water shoes given our first experience – this was a mistake. The entire trek from Whitehouse to the confluence was bone dry and full of sand. I wish I had had my hiking boots for this portion. But then once you get past the confluence, the water shoes came in handy again as walking through the water was unavoidable.
Neoprene socks: 3mm, Calf- High
To go with your water shoes and protect your feet! I went with 3mm and wouldn’t recommend going any lower. They will add extra cushion in your water shoes and also will keep your feet warm. The 18″ height is also important because it helps to keep the silt and mud out. My fiancé got ankle socks and was getting stuff stuck in his socks constantly.
Open Mouthed Water Bottle: Nalgene or similar
Some of the seeps are little more than a trickle, but multiple trickles will fill up faster than collecting just one. Also, if you’re trying to get water out of a pool that has collected on the ground, an open mouthed container is much easier for doing this than your hydration bladder.
Gravity Water Filter: Platupus 2Liter (or similar)
This is such a time saver and allows you to no be so reliant on the fresh water springs. Just fill up one of the bladders when you get to camp and let gravity do the work! You’ll have 2 liters of fresh clean water for cooking or refilling your packs shortly.
Distance Tracker: GPS Watch
Given that there’s no cell service and you need to make sure you find the fresh water springs, you need to know how far you’ve hiked and when you should start looking for them. A GPS or pedometer or other sort of mileage tracker will help you keep track of where you are in the canyon so that you know when to start looking for the fresh water springs and also if you’ve made your day with how far you needed to travel before setting up camp.
Trekking Poles: Adjustable Trekking Poles
I personally don’t usually use trekking poles since I like to have my hands free, though I know many do. Trekking poles would be very handy here for: crossing the river when you can’t see what’s on the bottom, testing muddy areas to see how much they slip or grip, as a third leg when crossing some treacherous mountain/ rocky areas towards the end of the trip.
Foldable Stool: REI Co-op Trail Stool
Normally, you wouldn’t want to carry the extra weight, but it was SO glad I brought this! In many of the campsites there’s no place to sit at all and after walking all day, sitting on the ground on tired legs kinda sucks. Also, this was super handy and helpful for getting off those wet neoprene socks and water shoes!
Camp Shoes: Lightweight, foldable sandals or similar
This is already included on the backpacking checklist, but I just want to reiterate it. After walking in water for 10 miles, you’re going to want to put your feet in something else. Plus your shoes will be wet (even with water shoes) until the next morning, so you need something to wear around camp.
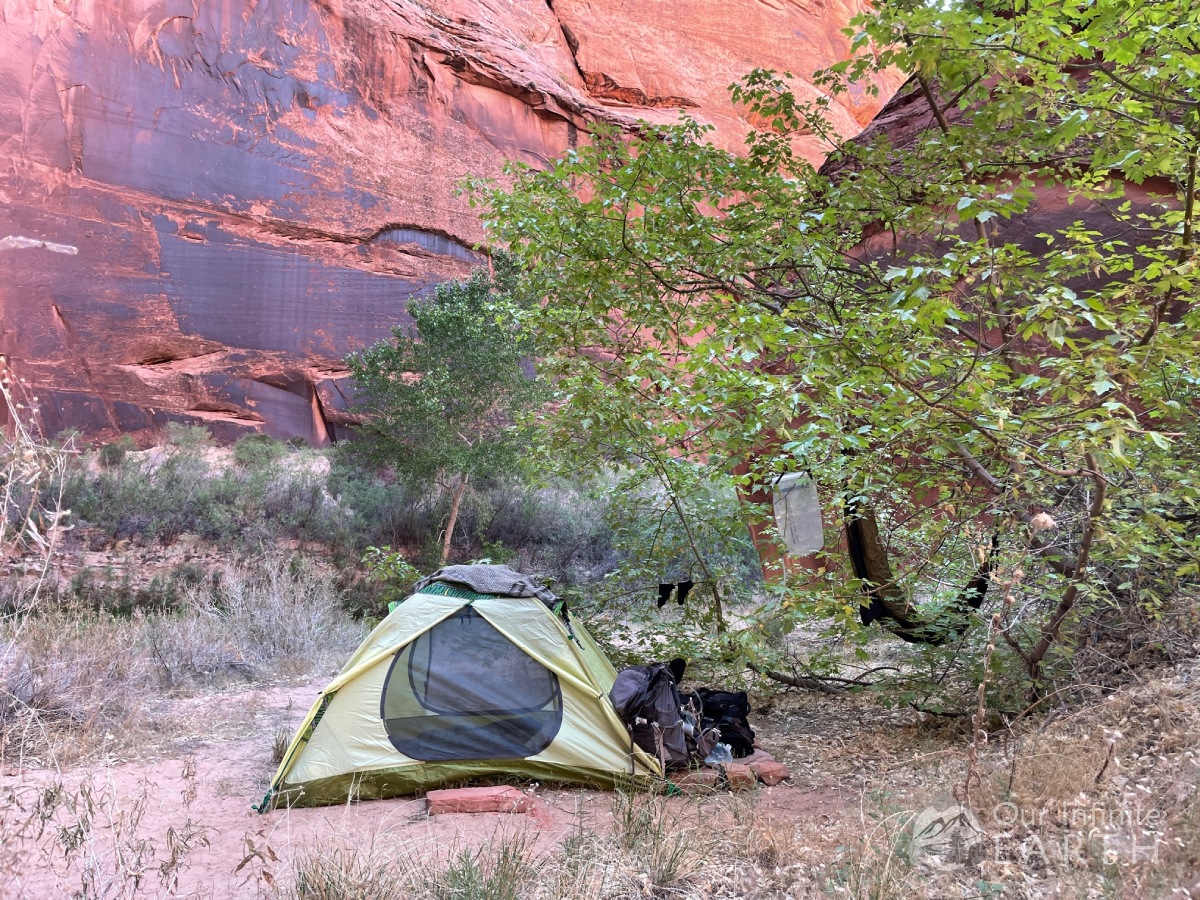
Optional:
Hammock: Odoland Lightweight Camping Hammock
There were surprisingly a lot of trees, especially towards the beginning and end of the hike. Pretty much every campsite had a tree or two of some kind and most were pretty sturdy. If you wanted to, you could probably make a hammock work in quite a few of the campsites. Letting every part of your body fully relax in a full day of hiking is really a treat.
What To Expect Along The Trail: White House to Lee’s Ferry
When you pick up your permit from the BLM, you will be given Wag Bags. In the past, Wag Bags were only required in the narrows and you could just use a trowel for the rest of the canyon, but this is no longer the case and they’re required for the entire hike.
The terrain changes drastically as you go through the canyon. There are 4 pretty distinct sections that I think you can separate the trail into, each with its own unique challenges and beauty.
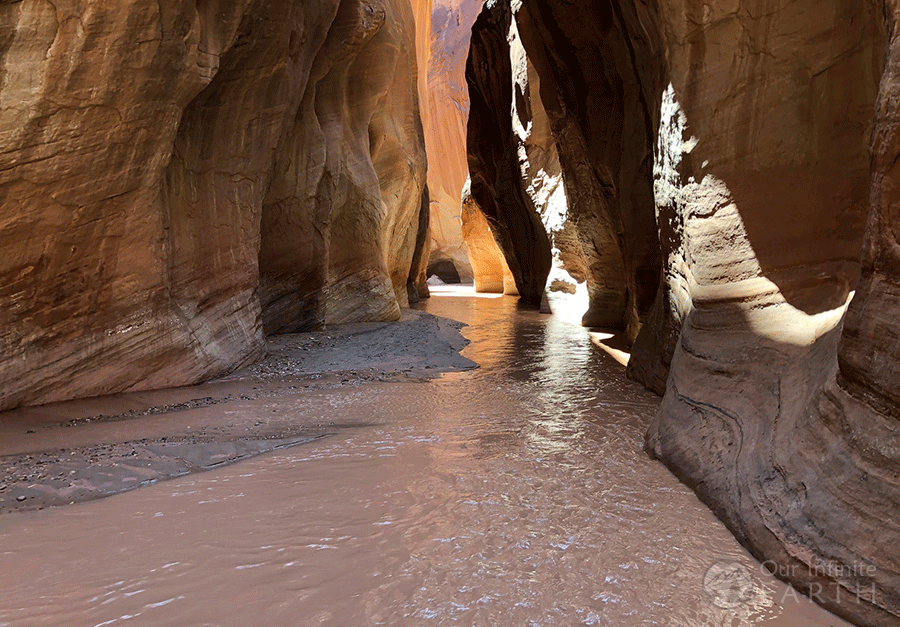
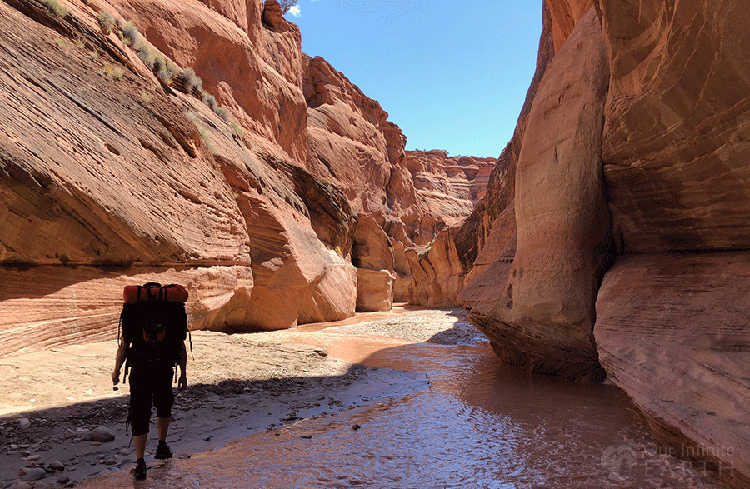
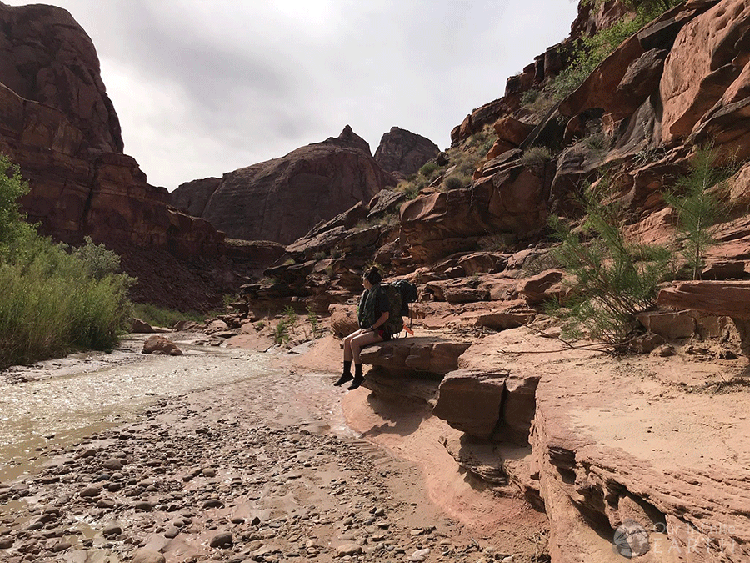
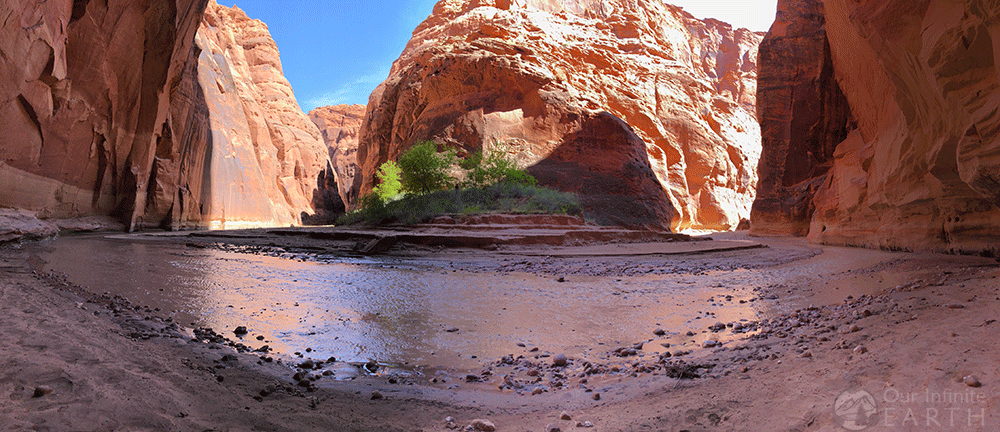
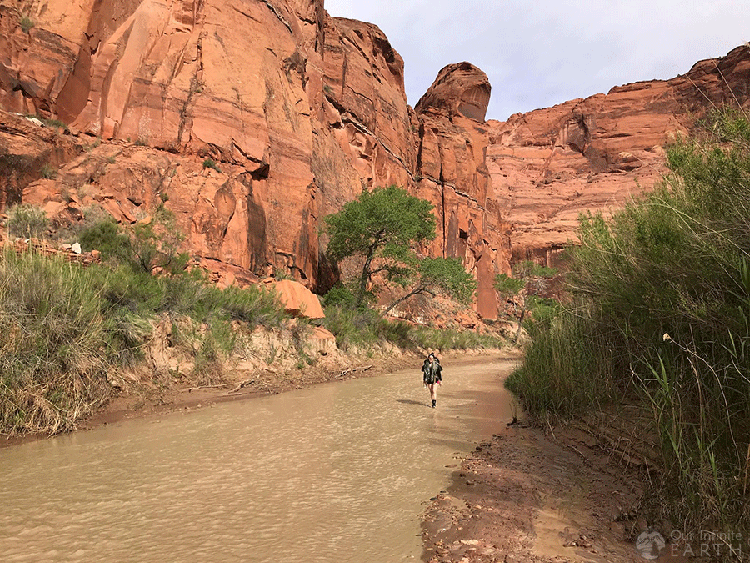
“The Canyon”
White House/ Wire Pass /Buckskin Gulch to 7miles Past The Confluence
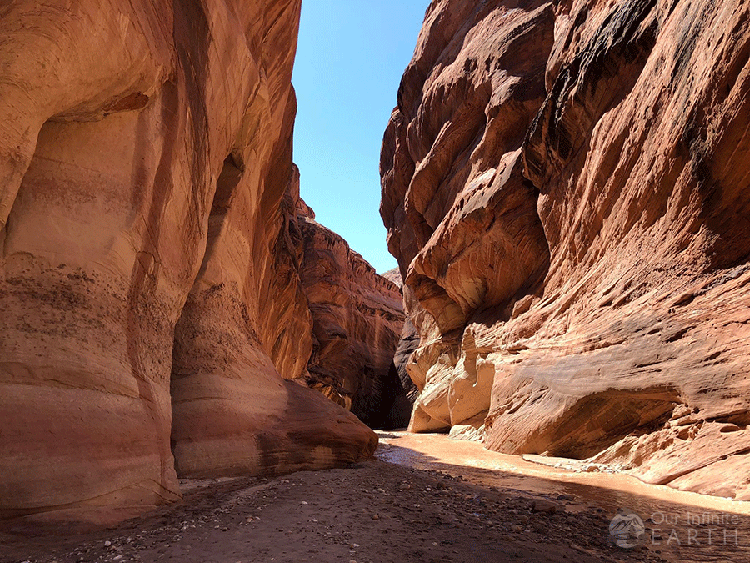
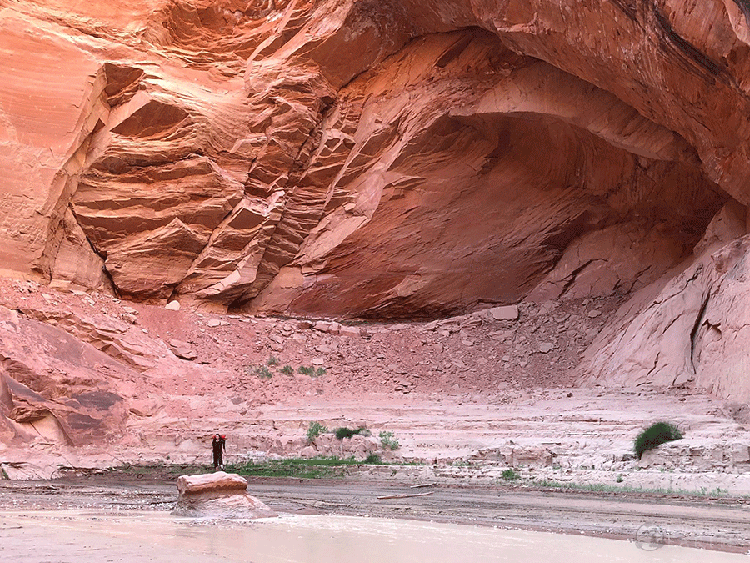
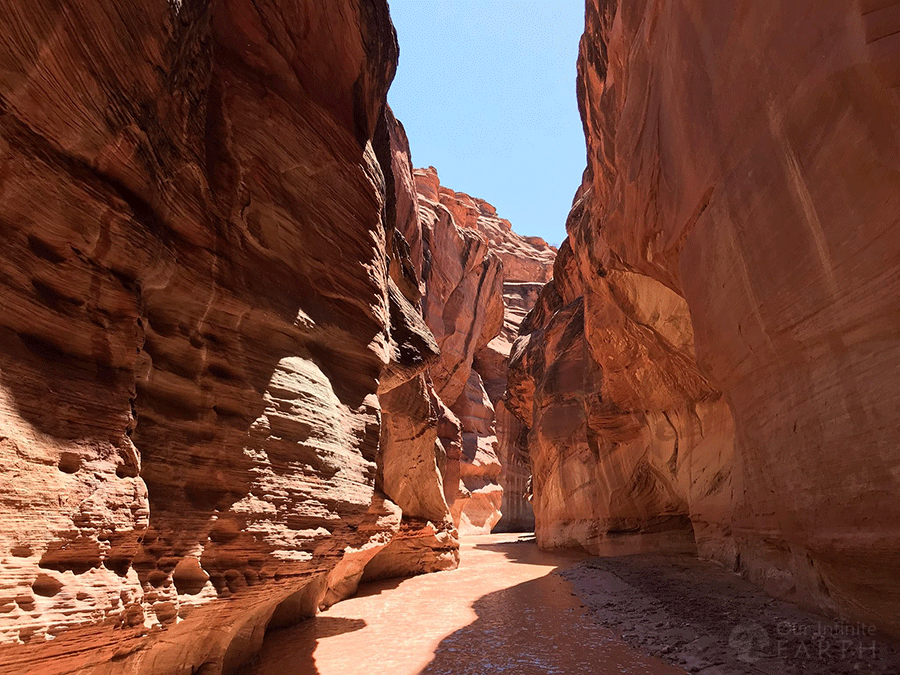
This section is what you think of when you think of this trail and what the majority of photos you see are from. Tall canyon walls, narrows, and river water. The canyon twists and turns which allows for a good amount of shade depending on how narrow the canyon you’re going through is. The first half of this section encompasses “the narrows” and then the canyon opens up a bit shortly past the confluence, but can still be considered canyon hiking. There are some really amazing canyon landscapes that make you feel very small and diminutive towards the end of this section. The rock formations are really impressive and have a surprising variety of colors.
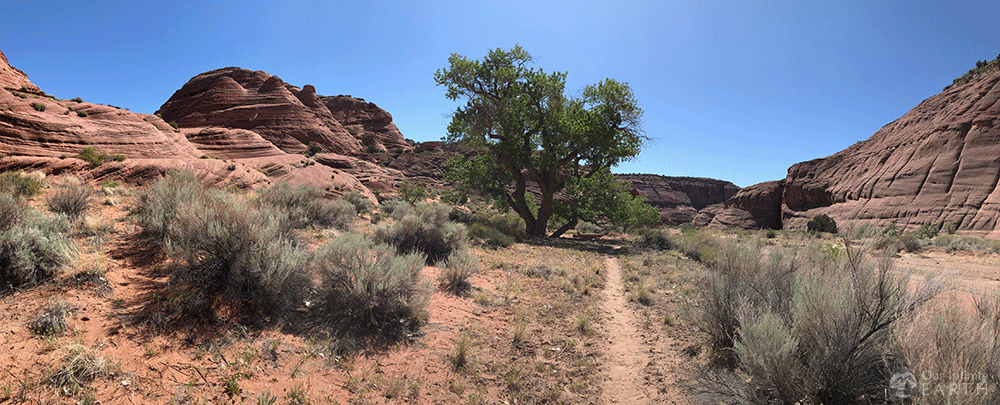
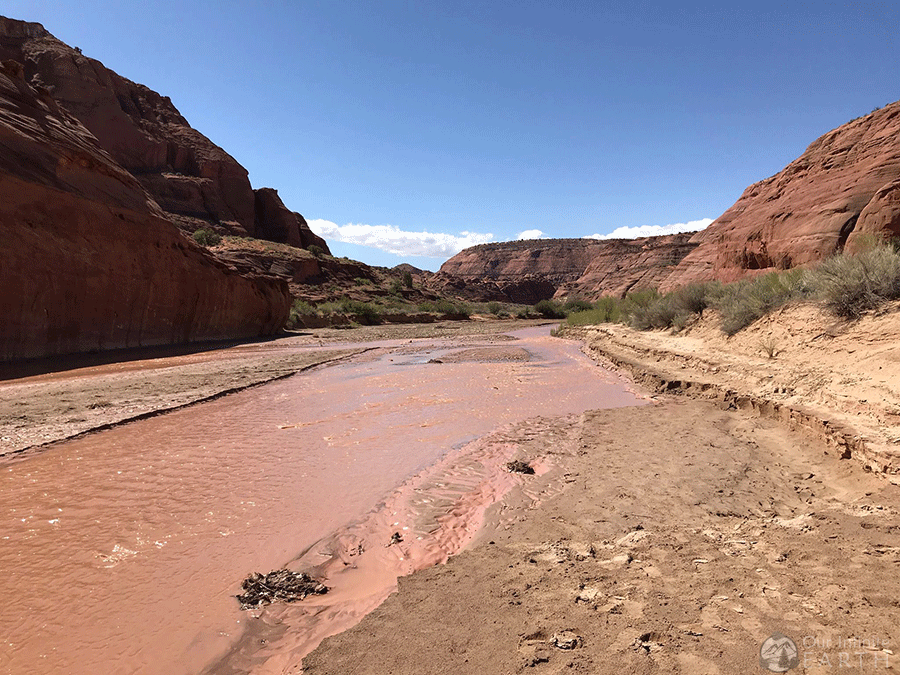
“The Marshlands”
7miles – 16miles Past The Confluence
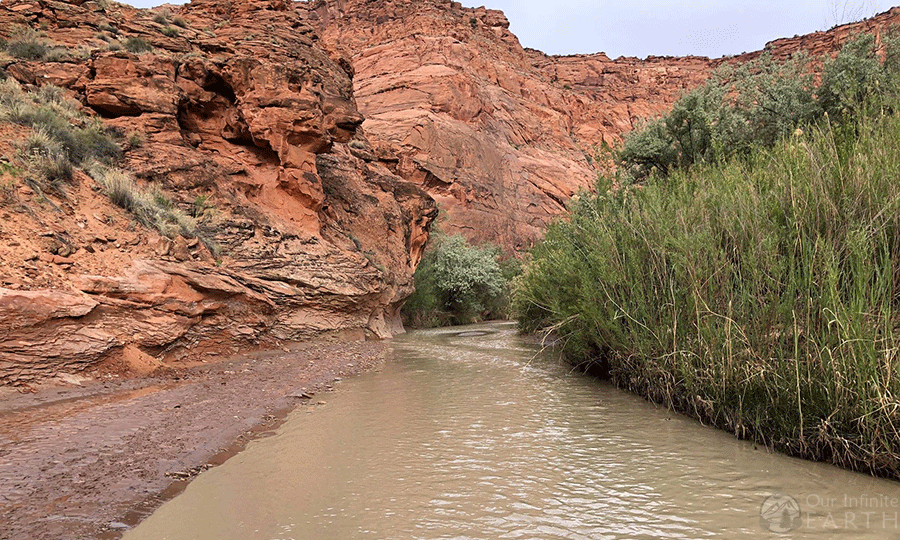
This was my least favorite section of the hike, and “marshlands” is the best thing I can think of to describe it. Here the canyon has widened considerably so that there is pretty much no shade. You continue to follow the river as it horseshoe-s back on itself over and over again. The sides of the river are lined with sandy banks with tall grasses and a few sparse trees, which don’t offer many places to set your pack down and rest. It was nice to start to see many small birds living in the grasses and trees along the river, and even a few tiny freshwater fish in some places.
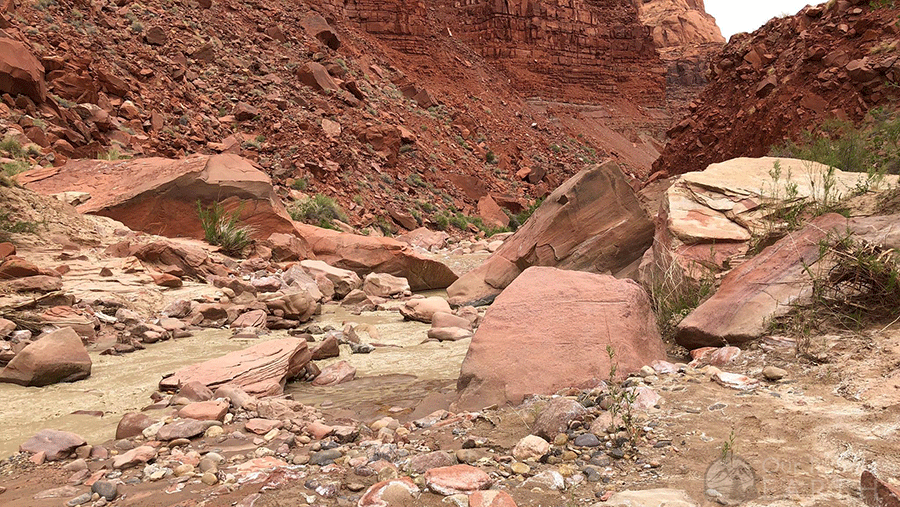
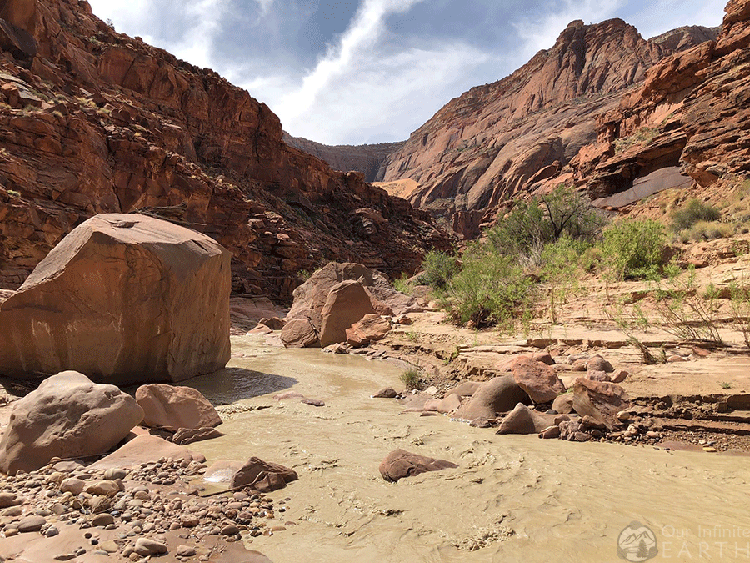
“The Rocky River”
16miles- 21miles Past The Confluence
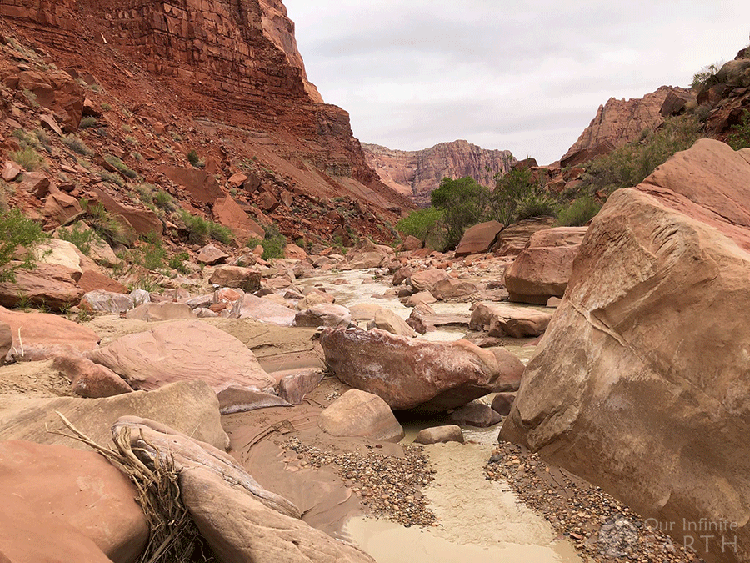
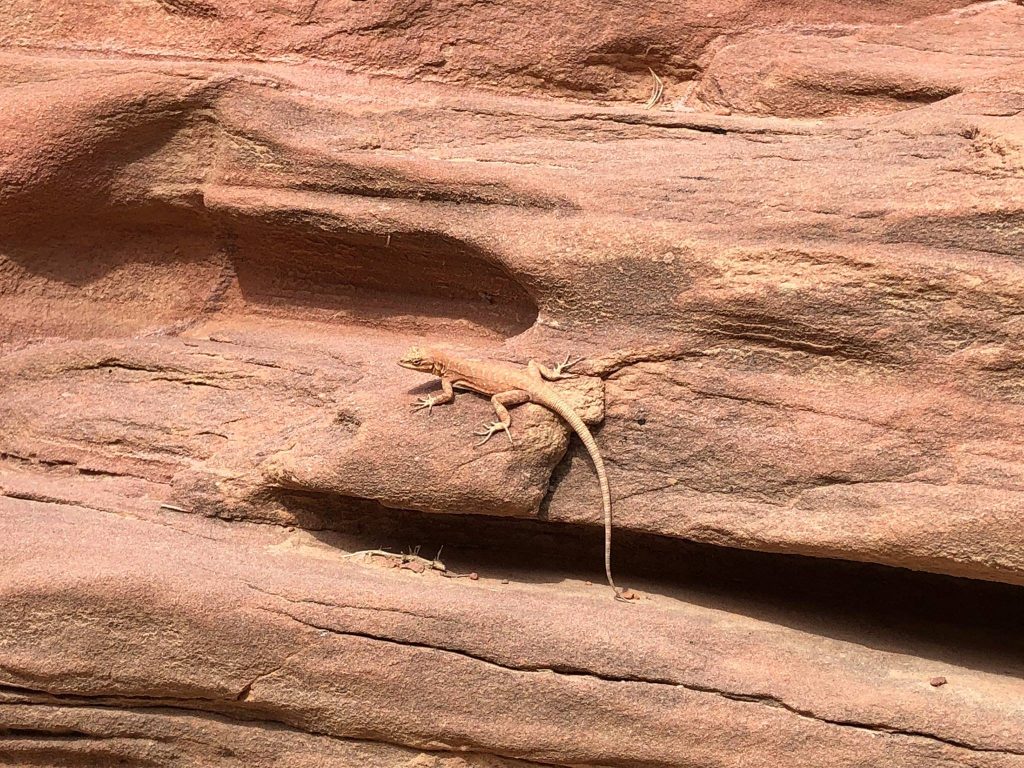
I grew up playing in a stream next to our house, so I thought this section was pretty much. The canyon has gotten slightly more narrow here, though the walls are no longer as tall, but there is some shade as you trek along the river. The river has become littered with big rocks and boulders that you have to bypass. The sides of the river have transformed from sandy river banks to rock ledges that blend into the walls of the canyon. The river has picked up speed here and there are several rapids and even small waterfalls in some sections. The going is slow as you’re more careful crossing the river and are mostly climbing over rocks along the side of the river to continue on the path. In this section is also where we started to see a bunch of lizards scurrying across the rocks.
I thought that the 1.5 miles from Bush Head Canyon to the next campsite in this section was the hardest section of the entire trip. Within that 1.5 miles, there’s one section where you’re up away from the river and walking through a bunch of rocks that have tumbled off the side of the canyon. The trail appears to separate and go in two different directions (someone put a carne here marking it), go to the left and stick near the river. The “trail” to the right is a false trail created by water run off and doesn’t lead you anywhere other than out of your way. This section is also unshaded, so that extra trek to nowhere was really draining on us!
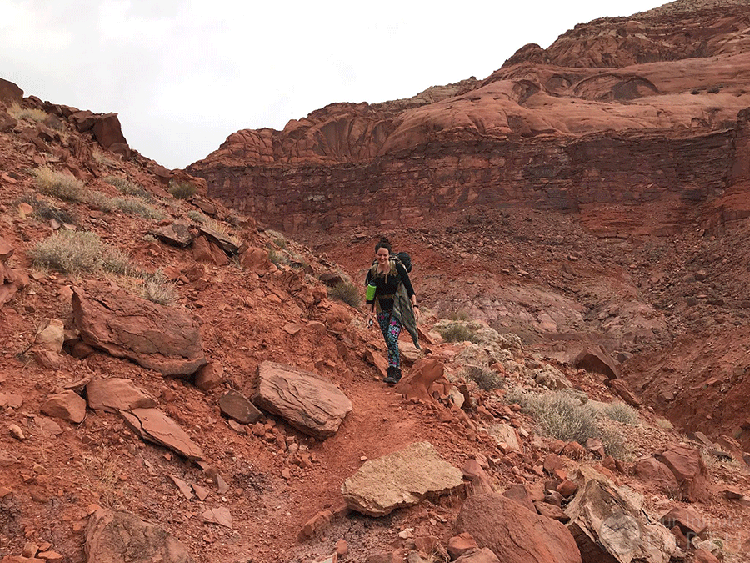
“The Desert Mountains of Mordor”
21miles Past The Confluence to Lee’s Ferry
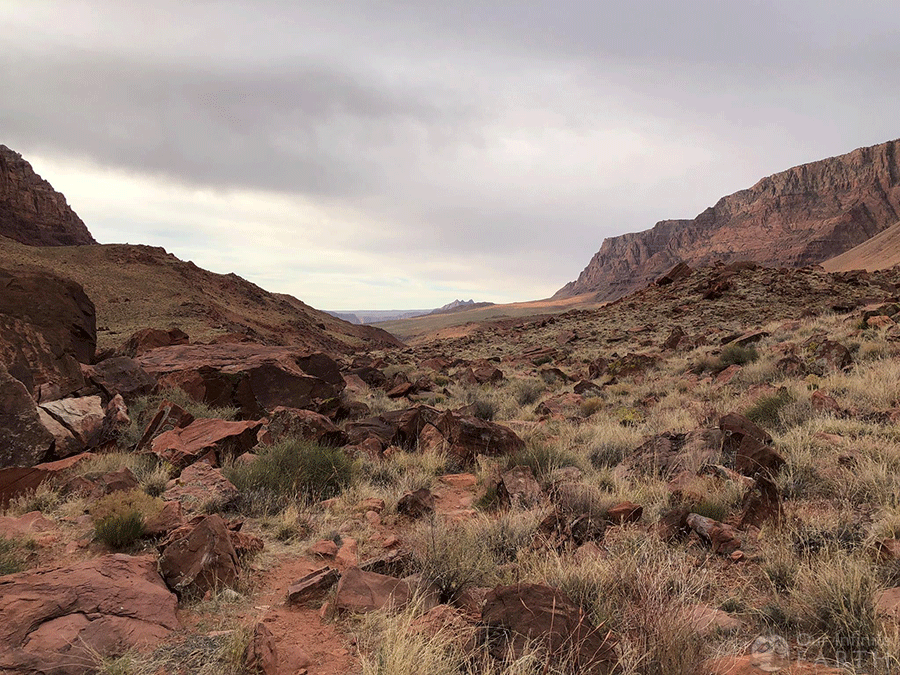
The beginning of this section starts off with an incredible and expansive view of the basin below (you can literally see for the next 10miles you’re going to hike). This is the start of the “high water route” – the trail follows along the edge of a mountain cliff far above the river below. Much of this cliff is rocky and has been created by rocks falling off of the larger surrounding mountains, and not all of it is stable. The trail is VERY narrow in some places (my fiancé removed his pack so that it wouldn’t bump the edge and push him off) and it would be very easy to misstep and take a tumble down the cliff which you would not recover from.
The trail climbs and descends through these “Mordor-like” mountains (I really felt like a Hobbit going through this area) before resulting in more traditional desert hiking. You continue to cross the river several times (don’t put away those water shoes just yet) as you walk through the center of this basin, completed exposed to the elements and unshaded. There’s lots of cactus and prickly desert plants to avoid catching an ankle on. There are tons of lizards here scurrying around and several birds as well. We also say a footprint for a very large cat – likely a puma or mountain lion.
Our Trip & Travel Vlog
Day 1
We met Tim our shuttle driver at 6:30am Arizona time who drove us to the White House trailhead, which was an hour away from the exit.
NOTE: Arizona doesn’t observe daylight savings time. Lee’s Ferry trailhead is in Arizona, whereas Wire Pass, Buckskin, and White House are in Utah, which may be in a different time zone depending on the time of year. This was very confusing for us as we crossed between the states often and were trying to figure out meeting times or start times.
We started hiking through the campground and were a little confused as there was no real defined path here. In general, we headed towards the river, and once we got to it, it was easy to see the foot prints of those who had gone before, so we just followed those!
Some landmarks: after 2 miles, power lines cross the canyon. After 4 miles, the narrows begin.
The trip really started to get beautiful once we entered the narrows. Prior to that we were excited to be starting our trip, but the landscape wasn’t anything to write home about. We passed a couple of day hikers and also a horse-tour of about 6 people with 2 working dogs.
Once we reached the confluence, we set our packs down on a sand bar and took a side trip into Buckskin Gulch. We didn’t go far enough to get into any real trouble or deep water, but just enough to get a taste of what it’s all about.
Returning to our packs, we continued down river and set up camp around 5pm, around mile 9.4, which was also across from the first seep that we came across. We filled our open mouthed container with the water dripping from the seep and used it to make dinner.
Day 2
The next morning we were up and on the trail by 9am. We quickly came to another seep which I mistook for being the Big Spring, and filled up our water from a freshwater pool on the ground. Around a few more bends, we then very obviously came across the Big Spring and a crow that was enjoying the fresh water.
The canyon continued to twist and turn a few more times before “the marshlands” began. At first, it was an interesting and nice change, but soon became tedious. There are lots of tracks of people cutting through the grassy sand banks as they horseshoe around on themselves. We tried this once and found that going up and cutting though was fine, but coming down, you usually had to slide down the sand embankment on your butt since your weight and balance would be off from the packs.
Also, there was little shade here, the sun was beating down on us, and we started getting harasses by some gnats and flies. We finally made it to mile 19 around 5pm and set up camp. I’m still not entirely sure if where we camped was an “approved campsite” since there were no signs of anyone else camping there, but it looked like we were in the right place on the map.
Day 3
We started with day at 8am and with very little water. Being only 3 miles from the next reliable spring, it wasn’t a big deal, but we were careful to conserve as we continued through the marshes. We almost missed The Shower Spring, which was on the right side of the river behind a big rock. We stopped and fill up on water, but still planned to get more at the next spring, so left our water bottle empty not wanting to carry the extra weight. We stopped for a break at what should have been Judd Hollow’s Pump, but neither of us water to go up onto the land to explore and look for it.
Shortly there after the “rocky river began”, which I found to be a welcome change from the “marshlands”. We passed some other hikers and stopped for lunch around mile 24.5 (or at least I thought it was mile 24.5) and witnessed an epic battle between a snake and pushup-ing lizard. The hikers we had past earlier, now passed us and stopped shortly past as a spring on the left of the river to fill up their packs.
We continued on looking for The Last Reliable Spring… and then we came to Bush Head Canyon. We realized that my mileage tracker was off by 1/2 mile (possibly because of cutting through the sandy banks in the marshlands which lowered our mileage?). The spring that the other hikers were filling up with was The Last Reliable Spring and it had been almost across from where we had stopped for lunch. Also, the first place we had passed them, must have been where the petroglyphs were as they were up on the tocks exploring them.
We continued on for another 1.5 miles to our campsite at mile 28, which I think was the hardest section of the entire trip. Upon setting up camp around 4:30pm, we realized that I had drank ALL of my water from the previous fill up and now had nothing left for tomorrow or for making dinner. I was prepared to drink out of the river with our filtration straws, but Sean made the decision to hike the 3miles one way back to The Last Reliable Spring to get us water. Luckily he came across the other hikers at Bush Head Canyon who showed him where a spring was located at the mouth of the canyon. This was John’s (the leader of the other hikers) 5th time going through this canyon, so he knew all the ins and outs and prepared us to expect a very difficult day tomorrow.
Day 4
Given John’s warning about the difficulty of what lay ahead of us, we were up an on the trail by 6am, wanting to beat the heat as much as possible. Shortly past our campsite, the mountains began. Being so high above the river and walking along such narrow paths was really daunting and exciting at the same time. This was a very unique and interesting landscape to be experiencing in that it was so different than anything that came before.
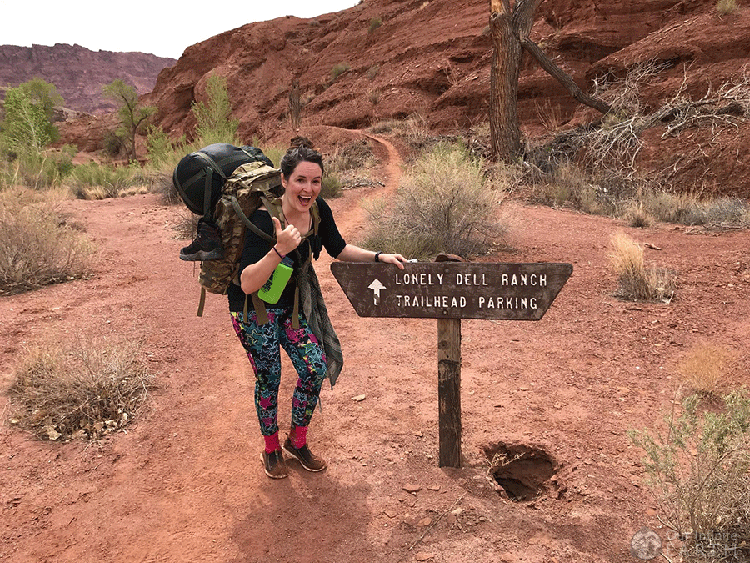
We were VERY lucky that the sun remained behind the clouds for this entire hike. We did the entire 10miles straight through with no breaks in about 4.5hrs since we didn’t want to tempt the sun. The last section was really nothing but desert, passing Wilson’s Ranch and a few other old ruins. We came out one a road for foot traffic only that lead to an orchard. We could see the parking lot across the river, but the only way to get to it was to follow the paved road for another 1/4mi or so. Not the most idea way to end a 38mile hike!
Excellent Beta! My Fantastic Friend & I trekked through Buckskin Gulch & the Paria Narrows for 3 days 30 years Ago…. almost Zero Information.
Wow… Scary, Dark, Cold, & very Intimidating.
I’m going back this week…. to see Golden Light & Epic Slots. Thanks for your detailed Information.
Gonna wear my Wetsuit & Canyoneering Shoes for Buckskin Gulch.
Hope you enjoy the trip! It’s a really magical place!
Thanks so much for all the info .. I’m having a hard time gauging what shoes my kids should wear due to the cold paria? I bought them water canyoneering shoes with 3mm neoprene socks but we just kayaked horseshoe bend this weekend and camped on the Colorado but my sons feet froze (I did not bring the neoprene socks so I’m still not sure if they would have solved his problem I forgot his kayak was a kids ocean that let the cold Colorado in the whole 2 day paddle) but now I’m considering getting them fishing waiters which I had not considered due to the miles we will have to cover. I’m thinking of getting waiters now for my 5& 8 year old and tie to the pack their canyoneering shoe with neoprene socks for just in case waiters fail??? Assuming my 11 yr old will do fine with the neoprene socks &shoes. My kids backpack a lot so I’m not worried about the trip but with kids they do great as long as there comfortable so trying to figure out best foot wear for them to keep there feet warm and comfortable wondering if u think waders are over kill and the paria is doable with just the neoprene socks? My kids have done the narrows Zion a couple years ago but just a day hike and we were spoiled and rented the gear from the Zion Disneyland lol. This is the first time we have done a spring hike we are just used to summer backpacking so it’s just thrown me a little weather wise. Kids have backpacked lost coast CA,havasupi, enchanted valley Olympic NP, fisherman’s trail Yosemite etc And day hiked the subway Zion but this one I need help with figuring out the paria any thoughts suggestions greatly appreciated. We go this April early April.
Also I have not study the springs or campsites yet .. we do about a mile an hour with the kids normally 8 miles/hours a day. We are doing 4 nights 5 days starting at Whitehouse ending at lees ferry . Suggestions on camp spots Along the way .. I always have to figure it out cuz we have an unusual pace compared to most backpackers.
I think neoprene socks would be better than fishing waders/ boots. I don’t think waders would give you the support and traction that you need for this hike, especially when you are scrambling over rocks/boulders. With the neoprene socks your feet are still going to be chilly, but that’s just a side effect of the hike since so much of it is in the water. Since they have done the narrows, the beginning of this hike is pretty similar to that if that helps with your decision.
For the campsites, the first available campsites are just after the confluence, but these are pretty exposed. We prefer the sites that are roughly at mile 9.5-10. But if you’re planning on hiking into Buckskin Gulch for a day, it might make more sense to stay at one of the earlier sites. After that, it just depends on how many miles you’re hiking per day. The campsites are much less obvious later in the hike and are all pretty similar. Camping close to the springs is a good strategy if that lines up with how much mileage you have to do each day. The last campsite at Bush Head Canyon is a nice big established site with a nice tree but then that leaves you with 13miles to hike on your last day.
Hi Sarah,
THis article is awesome. I have a beginner question though. It will be my first time getting a permit. So, if I wanted to go from White House to Lee’s, (which would take me about 4 days, 3 nights), do I only need ONE permit from entry to exit or do I need 3 permits for all 3 nights of camping? (I think Zion works this way where you have to get a permit per campsite, which makes it way more intimidating to plan out. Or maybe I’m mistaken. ) Thank you!
Yep – it’s just one permit for your entire trip (from entry to exit). When you apply for the permit, you’ll select your entry date and exit date. The one permit will be valid for the entirety of your trip for those dates.
Hey. Great info. I’m going to Paria on Tuesday and I’m strongly considering your tip to do an in and out trip.
We just got back from our second trip here on Mon – just missed you! We did this as an in and out trip and it was really nice to be able to explore the canyon without carrying a big pack. But at this time of the year, the hike in is very different than what we experienced when I first wrote this (updating it now). There’s a lot less water in the canyon and the entire first hike to the confluence is all dry and sandy. Makes it much more difficult for hiking and I’d definitely recommend hiking boots for this portion as opposed to water shoes since there’s no water.